So, again, it’s been awhile since my last post. I am going to attempt (no promises!) to post more regularly for at least the next few months. For this post, I am going to describe one of my newest ways to fix a quick, tasty meal without having to cook more than turning on the oven, or even dirty a pan much. You may have tried this before, but making a pan sized pizza using a flour tortilla is a great option for a meal.
I make pizza the standard way, though my favorite quick dough has become impossible to get, as least as far as I have found so far. I have tried the pre-made dough balls, but while that is fine to use and tastes good, it can take a bit of time to spread out, especially if you have family that prefers stuffed crust. BTW, if you do want to do a stuffed crust pizza, don’t use shredded mozzarella cheese. Use the solid block (I prefer the whole milk, but skim milk mozz is fine too). Cut it into logs as thick as you want, and roll the crust around it. Shredded just comes out onto the pizza, it never stays in the crust.
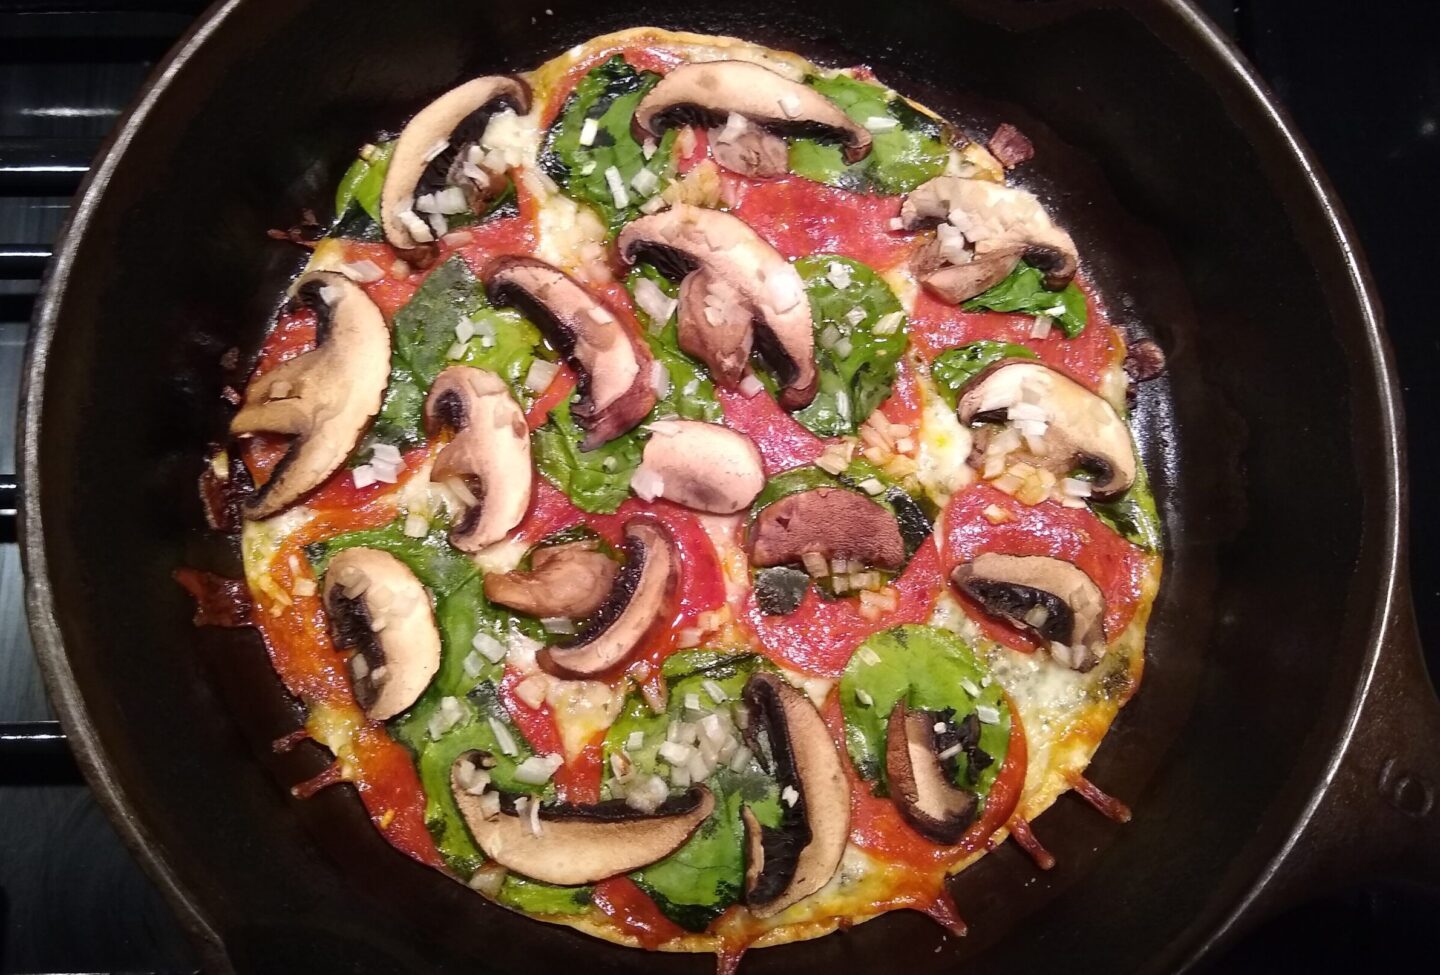
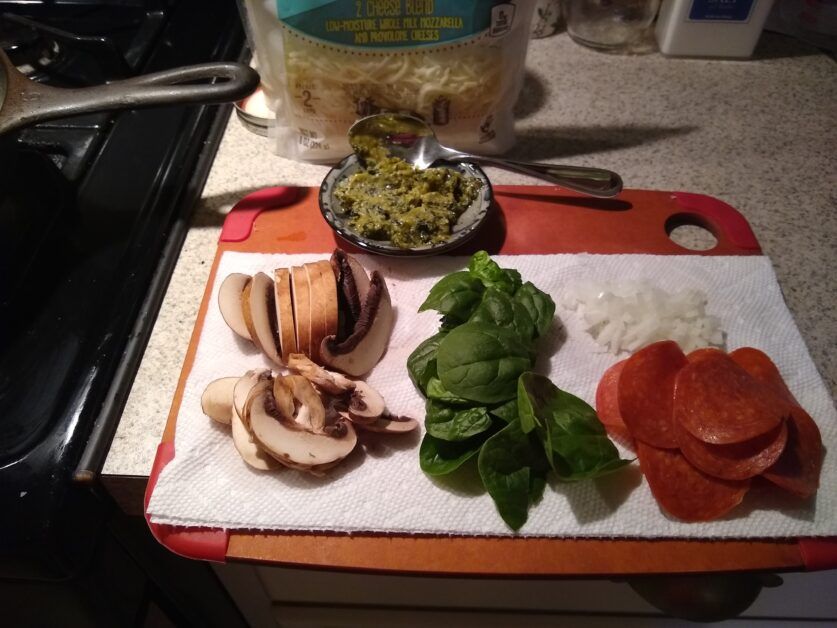
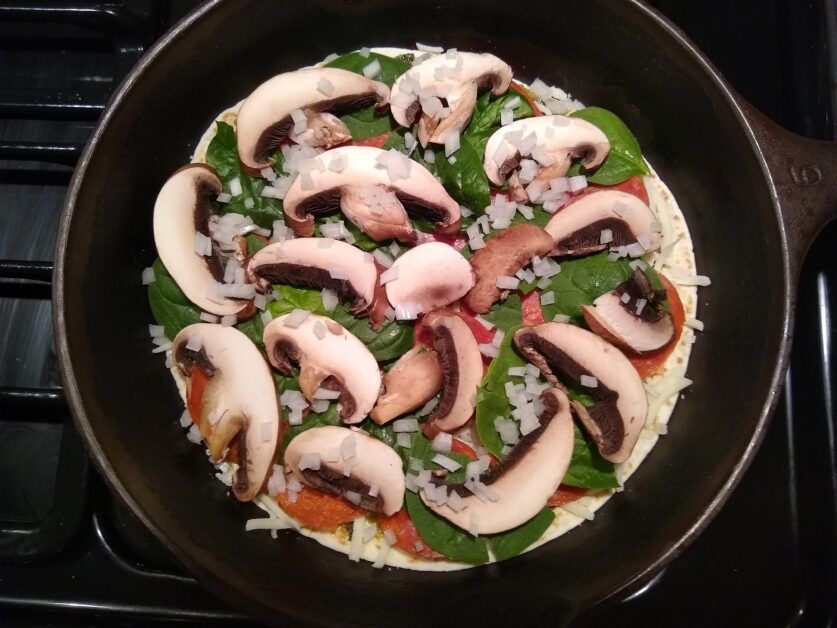
My toppings tonight, an iron pan that fits just right, and a pizza ready for the oven.
If you use this flour tortilla style pizza (or really, any tortilla is fine, you pick), then you will have a very crispy crust, and no stuffing option. However, it is super easy. I like using pesto as a sauce, because it is a little drier and doesn’t make the tortilla as moist, but tomato sauce works fine too, just be really careful not too use much. Then you just top with your favorite toppings. When using spinach or other delicate green topping, one tip is to make sure not to put them right on top, as they will burn in the high heat for pizza. If you have a cast iron pan, that is the best option, but a baking sheet is fine too. I cook the pizza at 425 or 450 degrees, and it cooks in about 10-15 minutes (depending on how you like your pizza – its a good idea to check it after 8 to 10 minutes, then keep checking until it’s done the way you like; once you learn the time you need for your pizza, you can use that time).
A quick and delicious way to have a personal pizza!
So, I am a few days late getting this post up, but classwork has been a bit hectic with the end of summer term coming up. Another post will be coming soon about video editing, one of the big new skills I am learning. However, to the second part of this blog post, the actual practice of cooking during the summer over an open fire. Just to remind everyone, wood, start fire with banked coals, get water on to heat. (Note: my experience is from research in a middle-class German immigrant town, which had enslaved workers in some, and later most, of the homes.)
So, now you have your fire going, you have gotten your water started heating, and it’s about 5:30 am. You’ve got a good start! Now its time to prepare the second largest meal of the day, breakfast. It is likely that the household has already gotten up and started working by now, because they also want to take advantage of the cooler morning hours. Breakfast in a German town would be around 7 to 8:30, depending on the family, but often a couple of hours of work would be done before eating (the English usually ate about 1 to 2 hours later than Germans for all meals of the day). I have even seen mentions of ‘second breakfast’ in records, which probably indicated getting some type of bread before starting work, especially those doing heavy labor, and then sitting down to a full meal once it was cooked (you thought Hobbits thought this up?). One thing to keep in mind about breakfast – if you wanted meat, it needed to be either quick cooking, or leftover from the day before. The thing to remember about meat before modern storage (meaning freezing or refrigeration) is that your choices for fresh meat are limited to the times you can slaughter and eat the meat before it spoils. That means there are big differences to what types of meat you are eating in summer, and how you need to cook it. Fresh pork is not available outside of the coldest months, and those are fairly short in NC. Between November and February at the latest would be the only time you ate fresh pork. Other than that, it was all cured (German families raised pigs on small lots and put up their own pork). Beef has a longer time it is available, up into May and early June, especially for young animals (veal). Mutton, common with English, is similar to beef. But the most common types of meat for summer are the smaller animals, fish, poultry, and eel being the most common I have seen. All of these can be killed and eaten fairly quickly, so spoilage is less of a problem. Other than that, you need to soak and cook cured meat for long times, so you are not cooking them for breakfast. So if a cured ham was boiled yesterday, you can cut slices for the breakfast meal, otherwise, it will be something that can be fried quickly, such as sausages. Eggs are quick to cook, and easily available during summer. Left over pies or puddings from cooking the day before, or on a baking day, were also commonly served at breakfast (these could be savory or sweet pies). Breakfast would be a hearty meal, similar to our idea of lunch today.
At the same time as getting breakfast ready, you have to get started on cooking dinner. This is the mid-day meal, and the biggest meal eaten. ‘Dinner’ is actually just the biggest meal of the day, but since most people have that at the end of the day now, we call that meal ‘dinner’. In the 18th century, the last meal of the day was ‘supper’, which was the smallest in terms of food consumed. Unless you were wealthy and had moved the main kitchen out of the household, no one wants the heat of a cooking fire to heat up the house, no matter who was doing the cooking. While it wasn’t uncommon for middle class households to have enslaved women cooking for them, there was still the issue of a hot chimney heating up the house, so most food was consumed before the hottest part of the day. Another thing to consider is how you want to serve the food – hot or ‘room temp’. Remember that ‘room temp’ in the 1700s is not 72 degrees, its whatever the house is at noon. So if you can fix some items early, then serve them at room temperature, you can get some pretty hearty meals without cooking up until the last minute. Something that was commonly served was savory egg pies, similar to a quiche, that could easily be prepared early, and then served at meal time at room temp. Most savory pies and puddings could be cooked early and served at room temp during the summer.
The best way to avoid the heat of the fire? Don’t cook the food. In summer, there are plenty of options for cold salads made with cucumbers, beans, and other garden produce that don’t require heat. Cooking a large ham can be done one day, then it can be used for several days after to create cold meals. A beehive bake oven (German style) contains the heat much better than an open hearth – when you have to bake bread, the best use of that heat is to bake other items that can be used over the next few days to supplement uncooked produce. All of these tricks allows a cook to limit the time in summer that the kitchen fire needs to be lit. But what about supper, you say? Well, that was the smallest meal of the day, especially in summer. You have worked all day in the heat. Most likely, you took a break at the hottest point of the day, and with sunlight lasting into the evening, you can work later when it gets a little cooler. A big, hot meal is the last thing you want to eat. Supper in summer might be bread and butter, or some fresh, green corn (field corn eaten before it matures was called ‘green’ when the shucks were still green; that is the only sweet corn that was available, and it was only eaten in late July to the first week or so of August). And that was all you had. The only people who ate big meals in the evening were the very wealthy who had separate kitchens, had not done heavy physical work during the day, and had enslaved women and men doing the cooking for them. Without all of those elements, supper was a small meal, and might not even be eaten at all in the hottest weeks of the year (a slice of bread and some beer would be enough for many).
So if you ever wondered how people dealt with cooking before the gas or electric stove and modern air conditioning, wonder no more. They adjusted what they ate and how they cooked, and dealt with the heat just like we do – by staying as cool as possible!
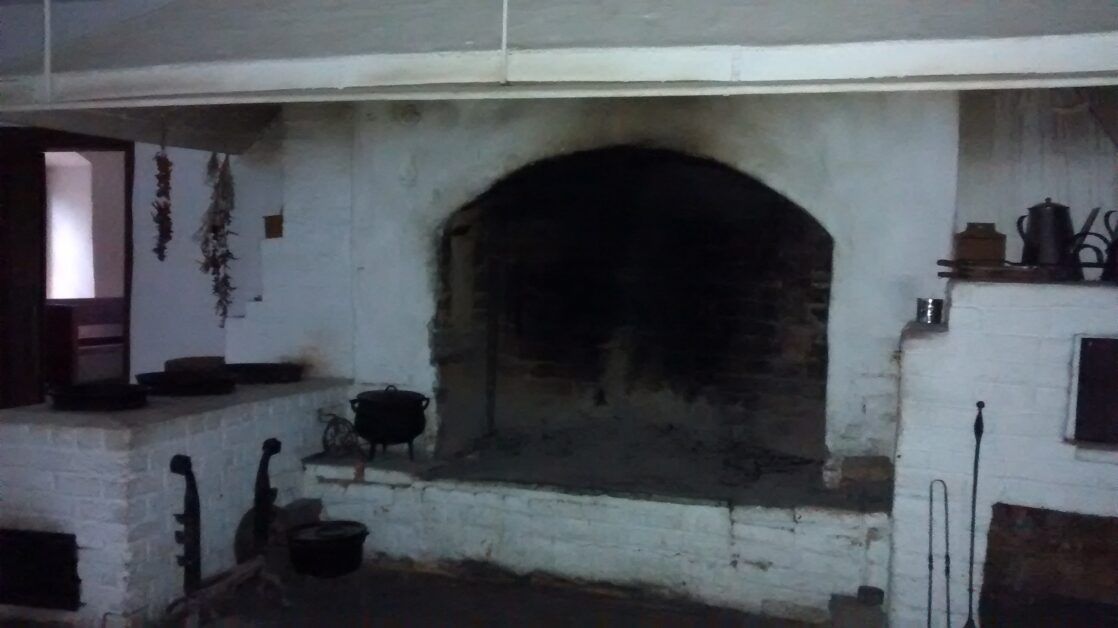
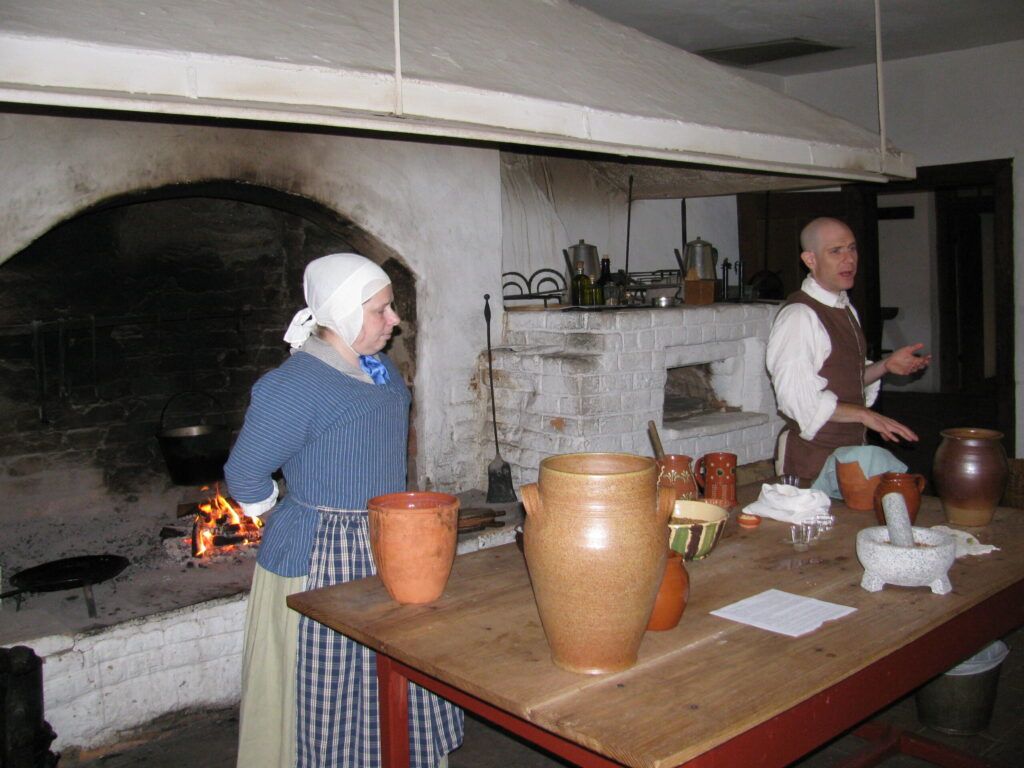
So, I have been intending to write about my experience cooking on an 18th century hearth with an open fire, and what better time to start that set of postings than during the beginning of the hot season in NC! To give a little background on my experience with hearth cooking, I am not a camper or a girl scout type of open fire cook. Personally, I like my gas stove, refrigerator, and running water when I am cooking for personal enjoyment. My open hearth experience is all due to my work in living history, where I got paid to work over an open hearth in July and August. It also means that I have cooked full, three course meals on a hearth, and served them to staff during working hours. This experience means that I am not going to talk about all the nifty camping equipment you can buy to cook with. Instead, I am going to give you an idea of how hearth cooking was done when it was the only option, and what middle class people did with average kitchens, not what the wealthy had available to them (I have never cooked in a kitchen like at Monticello, for instance). In this first post, I’ll give some of the starting points, and then next week I’ll continue with some specifics about summer cooking short-cuts.
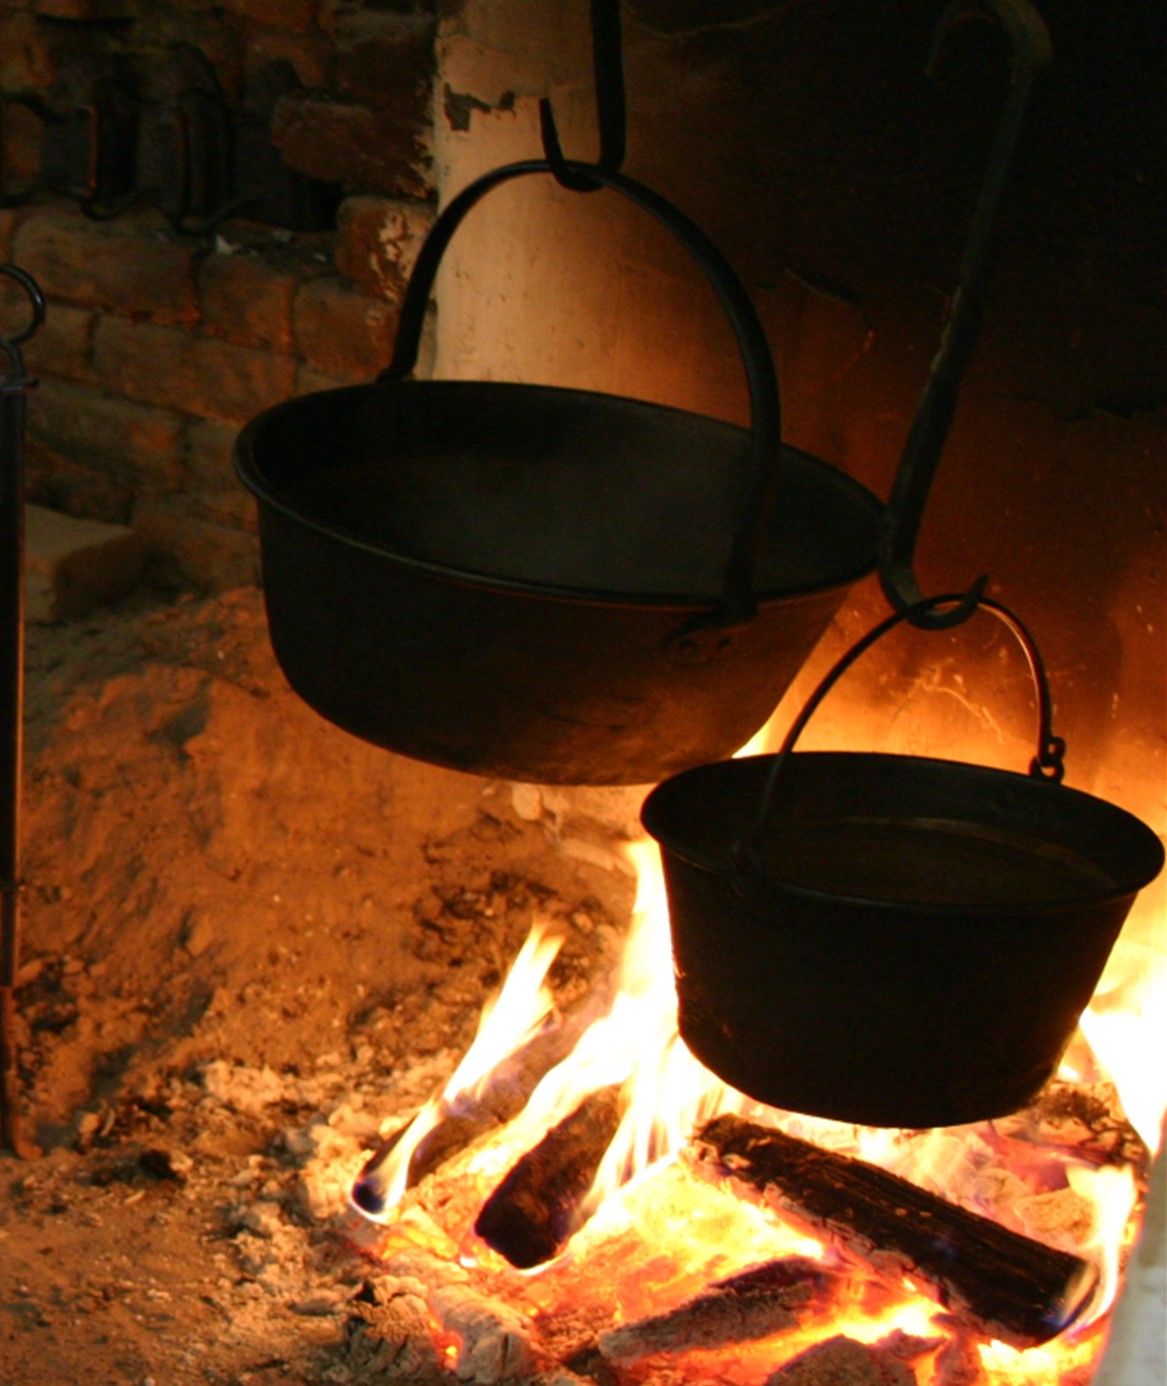
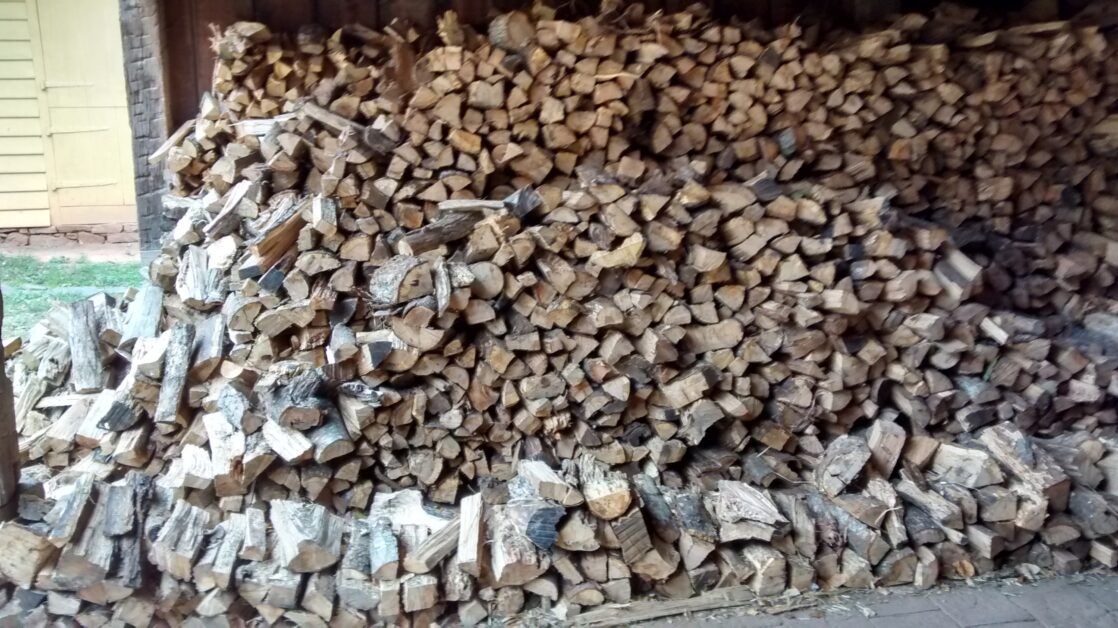
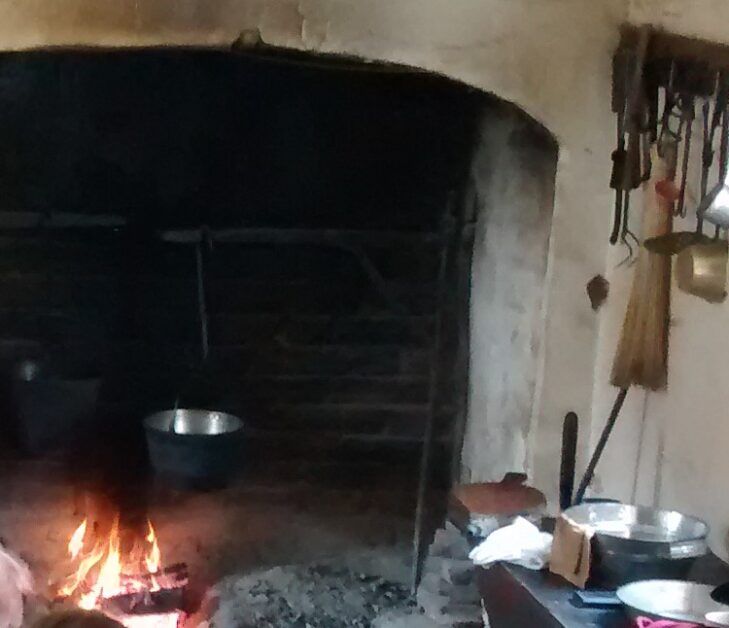
The first thing to know about hearth cooking is that it is all about the wood. I have done a lot of research about supplying and purchasing for kitchens, as well as cooking techniques, and let me tell you, all wood is not the same. In the 18th century, small town stores would re-sell fire wood that they bought from wood-cutters and others who sold it. The only types of wood I have seen accepted as payment in this way is hickory and oak (probably red oak, as white oak is better used for building purposes). Hickory brought the highest price, but oak was common. The reason for only these two types of wood is because of how hearth cooking is done. Big flames are not really the point, what you want are the coals. Flames are hard to control, they flare in and out, so cooking with flames isn’t really very efficient. Coals on the other hand radiate heat evenly, you can put them right where you want the heat, and you can ‘turn up’ the heat by putting more coals, or ‘turn down’ the heat by removing them. Hickory and oak, properly dried out, provide very good coals that radiate heat for longer than other types of wood. Properly dried out means that you can’t use green, or freshly cut, wood. Green wood takes high heat and a lot of attention to catch fire, and the extreme heat means that it burns to ash quickly – it doesn’t produce coals. (I have worked with wood so green it foamed when you used it – trust me, don’t use green wood if you expect to get any delicate cooking done without cursing, a lot!)
Some of your wood needs/ Raised kitchen hearth/ Me making beer with a co-worker
How much wood do you need? More than you would ever believe. A true cord of wood is 4 feet wide, by 4 feet tall, by 8 feet long (I say a true cord, because almost no one who sells you firewood today will ever quote a price for a true cord; most wood today is sold by the truckload, and it varies a lot, depending on the truck and how it is put into the truck). How many cords a family would need depends on a lot of factors, so there isn’t really an average. However, most estimate that around 30+ cords would be necessary for middle class households, and that is every year (a lot depends on where you are living, what type of heating is used, and house construction). That’s a lot of firewood! While that isn’t just for cooking, the kitchen would be the heaviest user of wood in a house, since cooking would take place year-round, while heating would just be seasonal. Summer cooking would definitely use less wood, but there would still be the need to have a fire everyday in the kitchen hearth, even if only for a few hours in small family homes.
Since I will continue this post next week, I want to begin with how a cook would start each day’s work. The next post will be more on how to cook quickly in summer, and what type of dishes would be most likely eaten in the hot season. As for getting started, the first thing to remember is – it’s hot in summer! I know, this seems obvious, but lets really look at what that means for a cook. With longer days, you really do want to get started as soon as possible with getting a fire going in summer. The main thing to consider is how fast can you get any work done over the fire, so that you can get it out and stop heating up the chimney. And no, most people did not have outside kitchens. That is another chimney and building to construct, and your average person would not bother with it. Instead, getting up by 4:30 in the morning, getting as much done by noon as possible, then get that fire out was the way to go. You might use an outside fire pit to heat water later in the day, but the main cooking would all be done by the noon meal. Another consideration – chimneys draw better when the air around the chimney is cooler. Really hot, humid days means that more smoke gets into the house, so the earlier you get that fire going, the better.
As for starting a fire, no matches, but also no flint and steel. Flint and steel looks good in the movies or written about in a book, but it is actually a pain to do, especially when it’s humid. The best option is to bank your fire carefully, which means to cover up the coals with ashes, and to do that before they burn out completely. That way, you just brush the ashes off, and have hot coals to start your fire the next day. (A big pile of coals properly banked will stay hot for several days.) And what is the first thing you put on the fire? Good question. The very first thing, after you make sure the fire has caught the wood, is to put a big pot of water on to heat. You’re going to need that for washing dishes, adding to cooking pots, all sorts of things. Generally, I want about 3-5 gallons of hot water available, depending on what kind of meal you are preparing (in summer, you might be fine with 3 gallons if you are doing less heavy cooking). And how do you get that water? Ah, the really fun part – go get it. Either from a well, or a creek or stream. I did sometimes have indoor water, but so did the 18th century town I was recreating. Most cooks would need to get water from some distance away, and carry it in wooden buckets. Two buckets full generally gets you 5 gallons at a time, and weigh about 50 pounds combined. You will usually need at least 10 gallons of water total, and I often got more over the course of cooking and washing dishes. (Don’t remind me about laundry days, then you’ll need between 40 and 50 gallons; yes, I have done laundry by hand!)
The next blog post will be about the actual cooking, but for this beginning, let’s look at a few things that the cook/housekeeper also would need to do that would involve a fire. Laundry was a 2-3 day job for most people. Two days if you don’t count the sorting, mending and soaking at the beginning. And those 2 days would need fire. The laundry itself would be boiled during the 18th century, and boiling a 30 gallon kettle of water takes several hours of a really hot fire. This was usually done outside, hopefully under shade if you’re lucky. Ironing was the second day, and for that task you have to set the irons in front of a hot fire to heat them. Depending on how much you need to iron, it can take anywhere from an hour to 2-3 hours. Since meals will also be needed those days, some planning needs to be done to make sure whatever is cooked can be done on the same fire if possible, or you have leftovers that don’t need heating (such as pre-baked dishes and fresh produce). The other big job that needs a fire is baking. If you’re English, a loaf or two every few days will need to be baked during regular cooking. Germans did batch baking, using one day to produce all the bread and many other baked goods needed for the week in a beehive oven (if you are smart, you plan laundry soon after baking). Both of these methods require additional fire and wood beyond what is needed for cooking. So next time you decide its just too hot this summer, think about having to work over a fire (and without air conditioning!).
A quick discussion about my new header pic for recipe blog posts. I am still getting better at putting pictures at the top of my blog posts, and I also want to be very careful about copyright law. I either use Creative Commons pictures, or I use my own pictures on this website. For the blog posts that I have with recipes in them, I have created a new header picture to use of a receipt book I made when I worked at the museum. I think a lot of people might be a bit confused as to why it says Receipt instead of Recipe, so I thought I would do a quick explanation of the difference. Up until the mid 19th century, cookbooks had receipts, not recipes, in them. A lot of this had to do with cooking over a hearth. There was simply too much variability in cooking conditions to give specific instructions for how to cook. The authors had to be vague on instructions to take into account all the different conditions that might be present. The type of hearth being used, the wood type, the cooking vessels, the time of year (weather, humidity, temp, type of raw ingredients available, etc) would all create very different options for the home cook. Even today, most cooking shows will give instructions on how to test your oven temp with a good thermometer if your baking times are different than stated, and everyone who has cooked on different surfaces (gas, electric, and especially induction) knows how different they can cook for the same dish. Multiply these variables by several factors and you get the problem for the authors of 18th century cookbooks. So instead of a recipe with specific instructions, you had a receipt that listed the items you needed and guidelines for cooking them. There were often substitution options for different spices, vegetables, and containers, heat instructions such as a ‘slow’ oven vs a ‘quick’ oven, and the all purpose ‘cook until done’ for time. All of this meant that a cook needed to be skilled in understanding how a receipt would be applied for a particular kitchen and time.
If you want to see a typical 18th century receipt, here is one from England, describing how to make Pigeons in Paste–Fill the belly of the Pigeon with Butter, a little Water, some Pepper and Salt, and cover it with a thin light Paste, and then to put it in a fine Linen Cloth, and boil it for a time in proportion to its bigness, and serve it up. When this is cut open, it will yield Sauce enough of a very agreeable Relish.The Country Housewife and Lady’s Director, Richard Bradley, 1736. Try giving that to today’s cook and see what they say about it! After years of experience reading and using this type of receipt, I could make this without too much trouble, but I wouldn’t want to serve it to guests the first time I made it. However, this gives a good example of the types of instructions in a published 18th century cookbook. If you were to look at a manuscript cookbook, you might have even less. I have seen major ingredients left off that I know are part of it, because the writer assumed they would remember the obvious ones and didn’t need to record them.
So that is the difference between recipe and receipt. For my own cooking, I still look at recipes like I do receipts. They are more strong suggestions to achieve a particular outcome than they are strict rules. I am always happy to change things I don’t like, or want to do a different way. This is why I am a good cook, but only a reluctant baker. Baking is much less forgiving of guesses and ‘good enough’ measurements. Personally, I consider cooking an art and baking a science, though I am sure that bakers might disagree!