I am one of those people who like to try a lot of different crafts (hence the name of this blog-A Little Bit of Everything!), and a number of years ago I decided to try making those really decorative Easter eggs called pysanky (all the pictures on this post and in the Gallery are eggs I have made). There are actually a lot of eastern European cultures that decorate Easter eggs, and the word pysanky is particularly Ukrainian. I have tried a number of other ways to decorate Easter eggs, and I’ll describe them below. Pysanky are one of the most elaborately designed forms, and it takes more time and equipment than many others. First, let me give a short history of coloring eggs for Easter. Eggs as a symbol of the renewal of spring goes back centuries, and while it is now associated with the Christian Easter, the tradition predates Christianity. Dyeing those eggs different colors also has a long history, and scratching a design into the dyed surface probably dates back just as far in time. It would be hard to document when exactly decorating eggs with multiple dyes in patterns using wax began, but it also has a long history. There was even an early form of the Easter bunny in Germany, called the Osterhase (Easter hare); a painting of the Osterhase carrying a basket of dyed eggs has been found in Pennsylvania from 1810 (link to image). PAAS egg dyes weren’t sold until 1893, when new dyes could be produced and sold in tablet form, and dissolved in water and vinegar. Like many traditions that were done on a smaller scale before the 20th century, the industrialization of materials and shipping allowed Easter egg dyeing to be done on a large scale. While more people were dyeing eggs, the skill and time to create the more intricate designs made that tradition stay confined to a smaller group of people.
The dyes used to color eggs before the mid-19th century were similar to dyes used for other products, using concentrated plant, animal, or mineral colors that could be made at home or purchased in the store. The production of the modern aniline dyes using coal-tar as a base began in the 19th century, but the wide use of them for most dyes didn’t really take off until the second half of the 1800s. Some of the commonly purchased dyes for eggs were cochineal, madder root, and turmeric. Other colors came from cooking at home, such as red cabbage juice, spinach juice, and onion skins. Some of these colors are ‘fugitive,’ meaning that they fade over time (sometimes a very short time if left in sunlight). Others last a long time if they are protected from strong light. I have tried all of them, and there are different techniques to using each dye to get the best results. Some work better hot, others work best cold after aging overnight, and many need vinegar as a mordant (a substance that allows the dye to stick to a surface). You can also get good results from combining certain colors to get others, just like you would with paints. For instance, red cabbage juice actually gives you a wonderful blue (as long as it ages 24 hours before use) but if you add yellow turmeric to it, you get green eggs. When I worked at the museum, we would do egg dyeing for Easter, and over time I experimented with many of these dyes.

The easiest one to try without too much effort is to use onion skins. You need a lot of yellow or red onion skins, but if you are using onions regularly in cooking just save the dry skins in a bag. You can dye the eggs by boiling them with the onion skins for a deep orange, or add vinegar and iron (just put in an iron vitamin) to get a dark brown. Or you can soak the onion skins and wrap them around the egg in layers, using string to hold them on the egg, then simmer for up to 1 hour or leave in the dye overnight. After the eggs cool, unwrap the onions skins and you will have a tie-dyed egg!

If you boil the egg for at least 30 minutes to an hour, and make sure it is stored where air can get to it (not in a plastic or styrofoam container), it will usually dry out inside over several months to a year, and can be kept indefinitely. The inside will gradually become a hard center, so you need to be careful not to shake it (I have broken them by not being careful, as the hard center acts like a little marble inside). I have seen decorated eggs, kept carefully, that are over 150 years old.
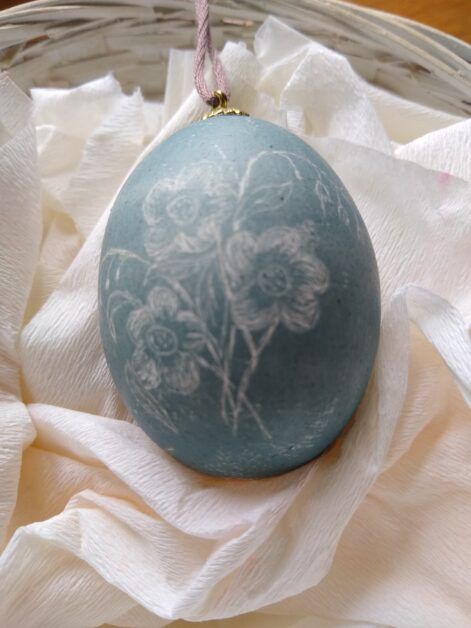
If you want to try something that takes a bit more time, you can scratch off the dye to create a picture on the egg. This works best with a single dye color, and the darker the dye, the better the design will show up. This can be done with most dyes, because the dye sits on the surface of the egg and scratching it with a pin will reveal the white of the egg below the dye. You want to make sure to boil the egg before doing this, and you need to get the feel for how hard to scratch with the pin, but you can get elaborate designs if you are willing to take the time. (This egg is dyed with red cabbage juice.)
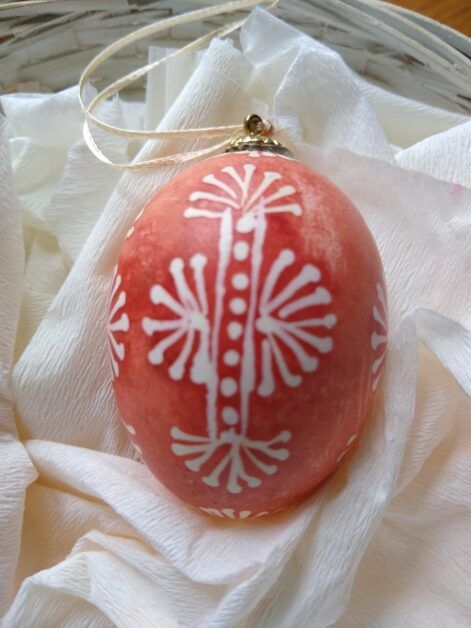
Another technique is to use a straight pin to apply beeswax to a boiled egg, by heating the head of the pin in a candle flame and scooping up a small amount of beeswax, then creating a design on the egg before dyeing it. The wax will preserve the white color below it, and you melt off the beeswax to reveal the design. (This egg was dyed with madder root.)
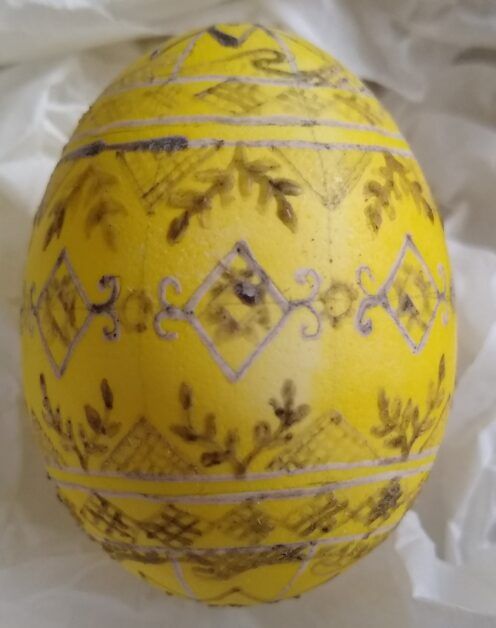
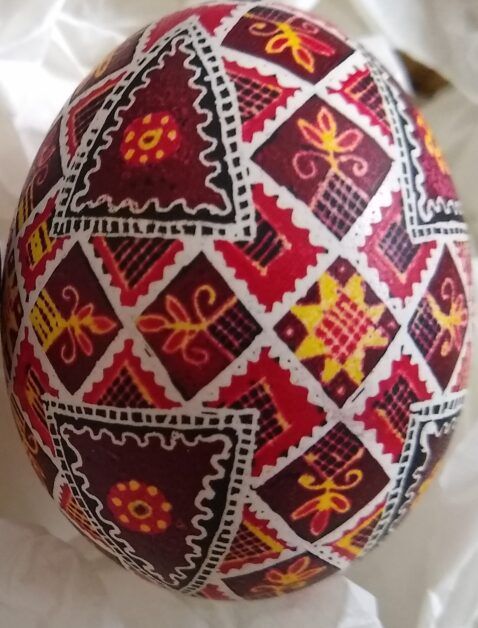
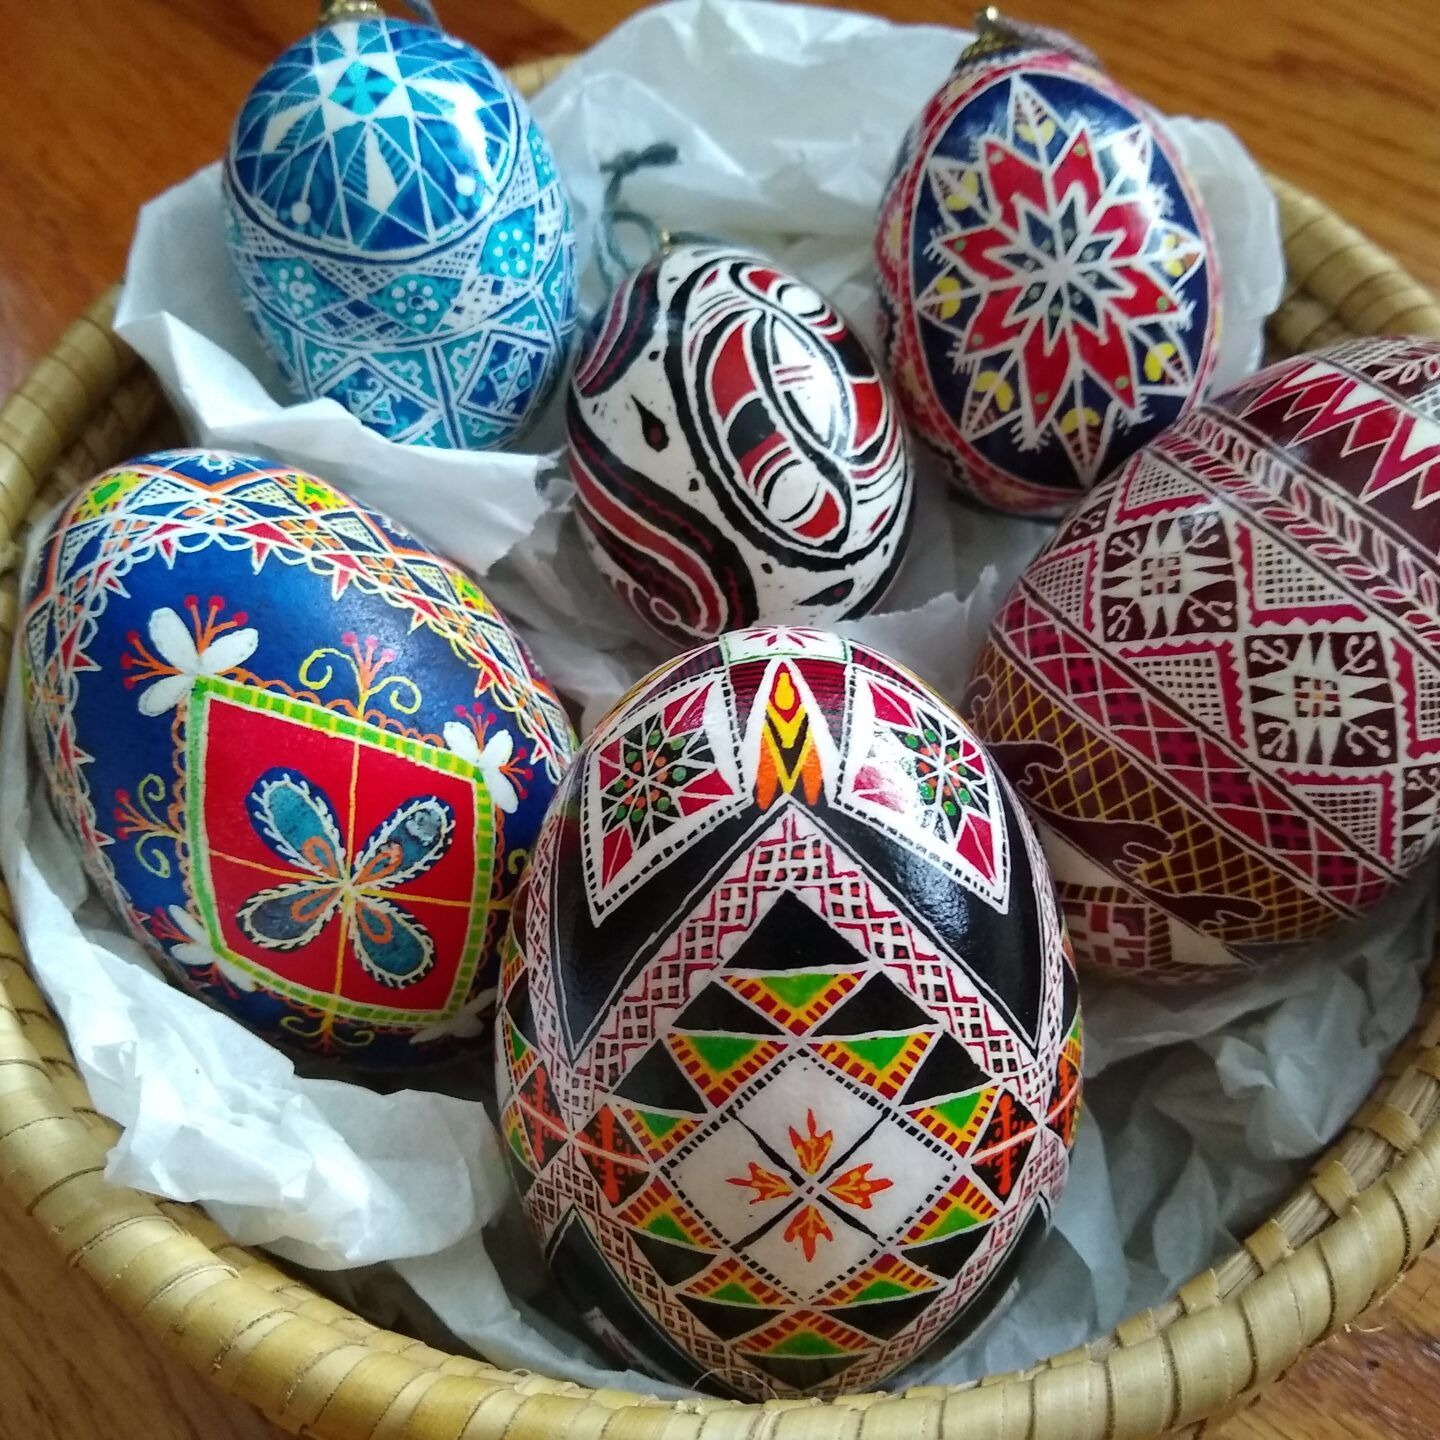
Pysanky uses multiple dye colors with beeswax to preserve sections of each layer of color. In this technique, you gradually apply the dyes starting with the lightest color, then proceeding through to the darkest to create a finished design that can be very elaborate. The wax is applied using a tool called a kistka, which is a small funnel attached to the end of a handle. The funnel is heated in a candle flame, then used to scoop up beeswax. You then use the narrow end of the funnel to apply the wax to the egg, creating simple to elaborate designs with the wax. Any dye under the wax will not be dyed with the next colors. Other than the steady hand needed to apply the wax, the main skill with this technique is planning the design. You have to create the design knowing which color each part will be, and make sure to apply the wax in the order of the dye colors. You can’t go back to a lighter color once the darker dye has been applied. Pysanky design books give the instructions for which designs to apply with wax after each dye bath. At the end of the process, you gently heat the wax to melting point, and wipe it off to reveal the design (I’ve done this with just a candle flame, but you can also put it in an oven set on 100 degrees). If you would like to try to make pysanky, I recommend this website by a family who originally came from Ukraine and now sells dyes, design books, equipment, and even finished eggs.