Growing Tomatoes – Some Personal* Experience

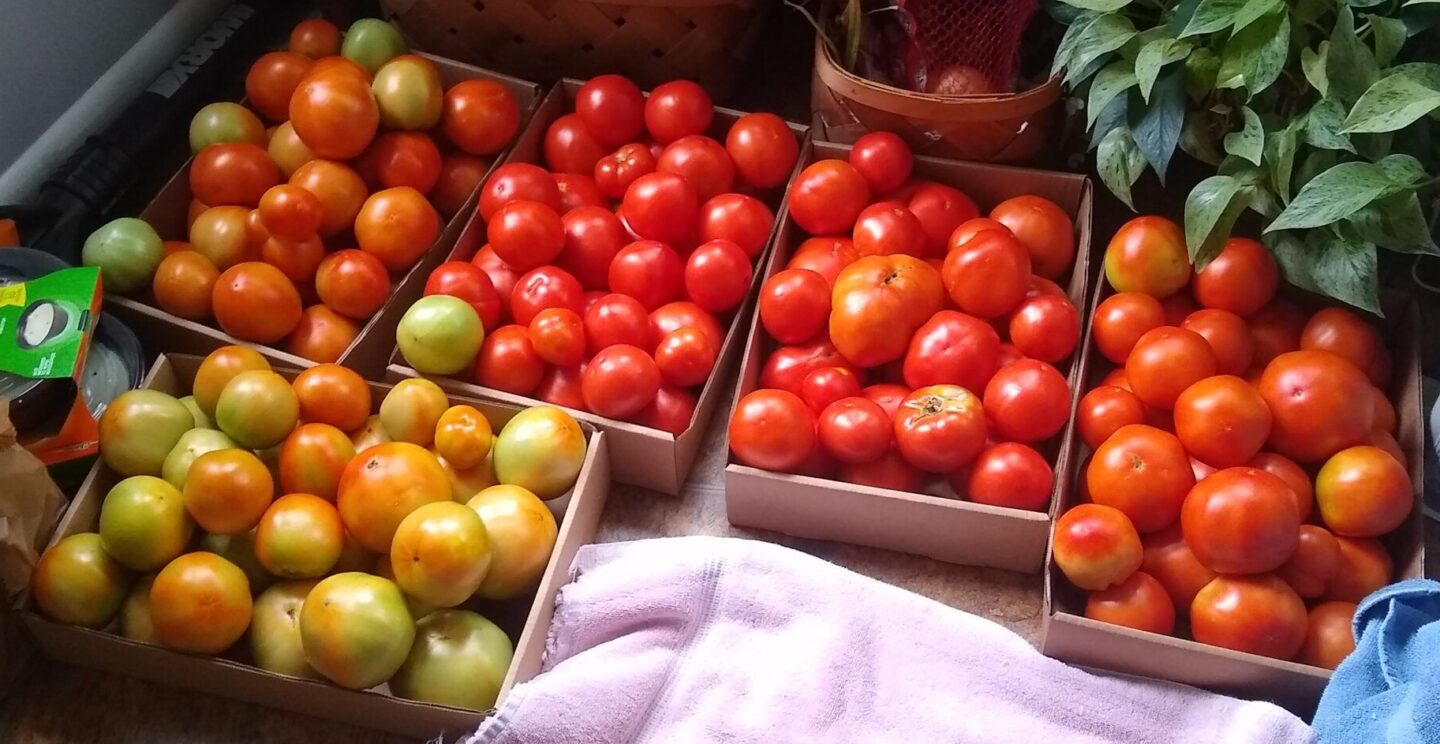
This post is going to be about tomatoes – yes, it probably would have been better to post this in July or August, or better yet May, when tomatoes are planted in this area! However, I don’t really do the planting and tending myself, I do more of the cooking. So for me, tomatoes are really more of an August crop, when I start to do a lot more cooking with them. (The first tomatoes are mainly for eating fresh, after the long months of having to settle for store-bought tomatoes. If that is all you have ever eaten, I feel your pain!) If you have read some of my earlier posts on gardening, you know I am not really the gardener of the family, that’s my mom. She has planted a garden every year since I was 4 years old, and tomatoes have been grown every year. And I’m not talking two or three plants. Generally the number has only gotten higher over the years, and for the last 20 or so years, its been anywhere from 40 to 60 plants. Usually about 45 is the average, and this year it was only about 37 plants. Mom went on a 4 week trip out west this summer, so she decided to ‘down-size’ the garden. (I argued, I was over-ruled. I had to do some of the picking while she was away – not my favorite thing in late July!)

So when I say ‘*some personal experience’ let me clarify that to say that I have seen how tomatoes grow since I was a kid, and I know the work someone else has done on a daily basis. What I don’t do is the main planting and tending! But I have seen a lot of the experiments tried, and on this post I’ll just share one – suckering – that is fairly easy to do, especially with just a few plants. It is also a great benefit if you are planting in a small area, because suckering helps contain the size of the plant. If you are interesting in reading more about the process, this link is a study done by Cornell University using the practice to increase yield. If you have grown tomatoes before, and never suckered them, you probably had a big plant with lots of leaves. At full size, they look like a leafy bush. Suckering prevents a lot of that leaf formation, so you will see the main stem of the plant the whole growing season. This has the benefit of allowing air to circulate, keeping moisture from causing disease, especially in areas of high humidity (hello, North Carolina). However, if you have never done it, the feeling early in the process is that you are going to either kill the plant or not have any tomatoes. I promise, done right, suckering will actually help with production!


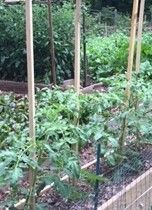
When growing, a tomato plant will put out alternating leaves on each side as it grows up, and each leaf will begin a new stem that grows out from the main stem. As that stem grows bigger, another small leaf will form at the juncture of the main stem and the side stem. That new leaf is a ‘sucker’. It too will grow into a new stem. This will happen at every stem juncture, for the entire early growing season. Basically, you end up with a bush that has multiple large stems. ‘Suckering’ is removing that extra leaf before it has a chance to grow into a new stem. This way, you keep one main stem at the center of the plant, and all side stems are limited to just one on each side of the main as you go up. Since you prevent the plant from putting effort into all that green stuff, it puts more effort into fruiting. As a gardener, you want the fruit, so suckering means you get bigger tomatoes when you sucker for the first 6 to 8 weeks of growth . After that it usually isn’t worth continuing, since most of the plant growth will go into producing fruit (there may be a small drop in number, but their greater size will more than make up for it).


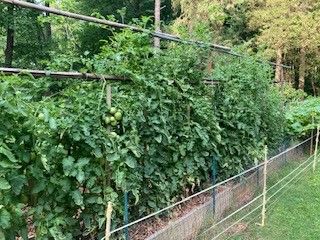
What does all this mean? Well, usually we don’t bother to sucker cherry tomatoes that we plant, because they are supposed to be small, and the plants just grow too fast to bother with the work of suckering them. However, last year mom forgot which plants were cherry and which were regular tomatoes in a small section, and suckered one row of the cherry tomato plants, while leaving the others to grow out. So we had a natural experiment. All the cherry tomatoes were in the same area, they all got basically the same water and sun, and we harvested tomatoes from both plants. Here is a picture I took comparing them side by side. Remember, these are the same type of cherry tomato, the only difference is that one set of plants were suckered, and the others were not.


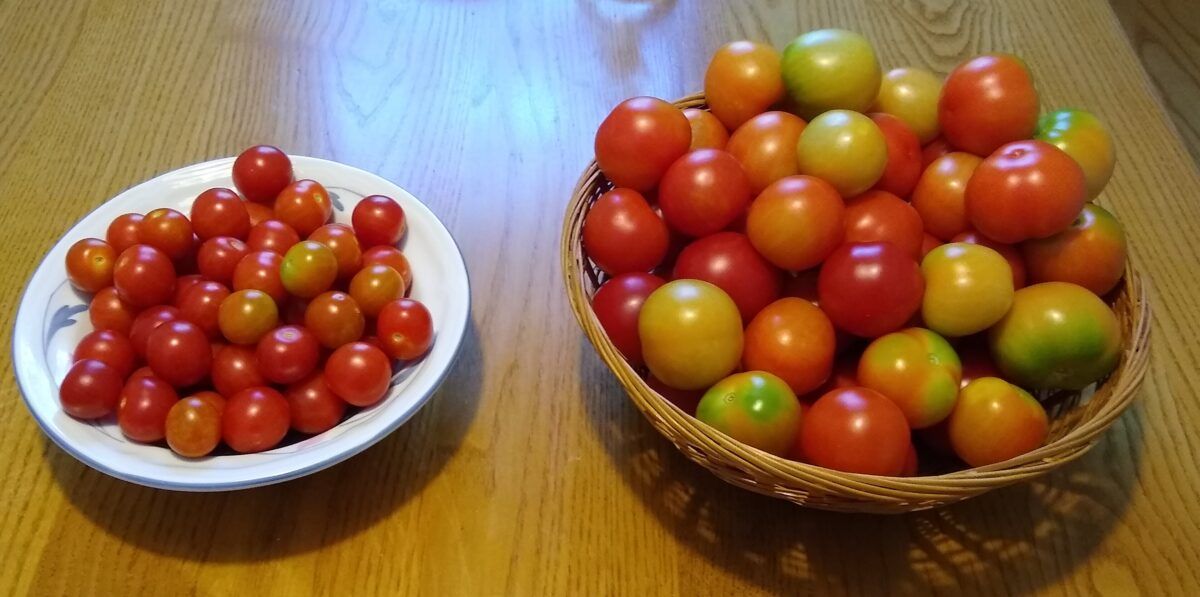
Want to guess which is which?

Planting for Pollinators

So, it’s been a few weeks since I posted. This is what happens to me when I am devoting my writing inspiration to graduate classes! I had intended to post this a little over two weeks ago, so it’s a bit late. However, the season for being kind to bees and other pollinators is all year long. That means you can use these suggestions for any time you are considering planting or taking care of plants in your yard.

About 10 to 15 years ago, we started to plan our decorative plantings a bit more carefully. Like most people, we had picked out flowers we liked, and included a lot of perennials. (If you don’t like taking care of plants, but you do like having them around, native perennials are the best choices; you are mostly limited to seasonal maintenance in the spring and fall.) At that point, I started working more with planting and gardening at the museum I worked at, and researching native plants became a bigger part of my job. As a result, I started looking at using them more at home as well. I am at best a lazy gardener; the less work I have to do for upkeep, the happier I am. I will do a lot of pre-planning to keep from doing maintenance, and I don’t use pots at all, because you need to water them every day, or even twice a day, in the southern heat. For that reason, the more I read about native plants, the better I liked them. Picked to suit a space, they need less watering, less weeding, and provide more for wildlife than any hybrid or non-native species.

The ability to provide spaces and food for pollinators is what I am going to concentrate on for this blog post. Most of the showy, constantly blooming annuals that you can purchase at a plant store are no good to bees and other pollinators. The effect of hybridization often reduces the production of nectar for many plants. The other problem is grass. When people grow grass that looks like carpet (often by using pesticides and herbicides) it decreases the amount of food that pollinators have available to them. While that type of lawn may look good to human eyes, to a bee it looks like a desert.


This is what a bee and other pollinators would consider a nice lawn. It has some grass, but there is a lot of other ‘weeds’ mixed in, many of which are the earliest blooming flowers in the spring. I saw honey bees for the first time this spring in mid-March. By early April, there was enough blooming in the lawn that honey bees, bumble bees, and and native bees like miner bees were getting a lot of nectar from the broad-leafed weeds in the lawn. I know that a lot of people don’t like these type of plants in their lawn. However, you can really see the benefits of them in the spring, before a lot of the flowers that people like to plant have started blooming and you see how many pollinators are using them. The flowers in the photos are from a plant called ground ivy. I will be the first to admit that it doesn’t look the best in the yard, and it will send out runners to plague your flower beds. However, I have made peace with my need to get rid of it just because I don’t like its looks. For me, it is more important to create areas for local pollinators, especially since I need them for food production. I think that is a fair trade-off, especially since it allows me to continue to be a lazy gardener!


When it comes to other ways to help the different species of bees and other insects, there are a number of ways to plant for them throughout the year. Native species of plants will only bloom for certain periods of time during the year, so having a variety that blooms over the span of the growing season takes some planning. My mother and I have looked for plants native to North Carolina, and concentrated on making sure the variety covers March through to late October. There are also lists of plants that are popular with pollinators, and you can pick types that appeal to you and the bees. The best resources to find these plants are usually local Ag Extension agencies or native botanical gardens. If you don’t mind waiting a little longer, seeds are a very economical option for planting. Personally, I don’t like wildflower mixes that you can find in chain seed stores. Often, those seeds might be native somewhere in the US, but not necessarily your area. If you have a huge area you want to plant, they might work, but if you buy several different seed packages of local wildflowers, and mix them up yourself, you’ll usually get a better result. An added benefit is that most native annuals will reseed themselves, no need for you to plant new each year (I told you I was a lazy gardener). For those in NC, a good source of information on native plants is NC State University Extension or the Botanical Gardens at Chapel Hill. If you are wanting to look up plants or resources in other states, one of the best options is the Lady Bird Johnson Wildflower Center in Texas. This site has information that covers all of the US, and you can look up plants by a wide variety of options, such as state, color, size, type, and many others.

In addition to plants, bees can use a few other things, especially if you are trying to help their survival year-round. Leaving some open dirt is good for miner bees and other native bees that use it for nest building. Dead wood, brush piles, and the dead stems of plants left on instead of cutting away in the fall, are also good ways to help pollinators (and other wildlife) have a place to stay over winter or build nests in the spring. If you have a bird bath, put a rock in it that sticks halfway out of the water. This allows bees and other insects to drink during the dry times; they need a way to walk up to the water without falling in, and most bird baths are too deep.

There are also bee houses for native bees that don’t build hives you can put up (just make sure you have some dirt/mud around for them to use). We put one up just this spring, and got it up just in time for the bees to start using it. You can see one of the bamboo openings already closed up with mud beside the bee sticking its head out. This was just three days after we put this house up near the vegetable garden. There are already about 20 openings covered in 3 weeks, so the house got put up just in time! (This is a miner bee. The bees have liked the smaller bamboo openings this year!)

If you want to find out more about pollinators, and how to help them survive and thrive in you yard, the Xerces Society is a good source for information. They have advice for general plantings, pollinator needs, and even a certification system for those wanting to spread the word about a commitment to cultivating pollinators. There is also a lot of information about attracting butterflies, and specifically the monarchs. Here’s another advantage of being a lazy gardener – longer lawns and leaf litter help fireflies, since they spend the daytime at the bottom of grasses and in leaf piles. There is nothing like looking out in the early evening in late May to see the first fireflies rise from the yard and woods. It signals the beginnings of summer! There are a lot of ways to help cultivate pollinators around you. And don’t worry about bees around your house (unless you are allergic to bees; you’ll have to decide what you feel safe doing where you are spending a lot of time outdoors). Those bees don’t care anything about you when they are looking for flowers. (I’ll write a post later this summer about how to avoid wasps, yellow jackets, and others considered dangerous; hint, they’re really not when you consider what they are looking for at different times of the year). As long as you don’t get in their flight path, aren’t swatting at them, and avoid smelling like their food source, they will leave you alone. (Avoid flowery perfumes, shampoos, and sugary smells if you plan to be outside with the bees; if you do, it’s not their fault if they come take a look!) I’ve stood watching bees at flowers from less than a foot away, and they never paid the least attention to me. Watching bees is one of the great pleasures to having a pollinator garden.

The Annual Leaf Pilgrimage

The end of the Annual Leaf Pilgrimage has arrived. If anyone reading this gardens, you probably know about mulching to preserve moisture and keep weeds down around plants and in a garden. Well, if you have never used them, leaves are a great way to mulch, and they act as a slow fertilizer when they break down. So every fall since I was a kid (and that was some time ago!) we have always gone around the neighborhoods in my city and collected leaf bags from anyone who put them out for the city to pick up. As you may have gathered from previous blog posts, my mother is a big gardener, and since she is happy to help take care of my yard as well as her own, I am more than happy to help her get leaves each fall. This annual drive-around usually takes a couple of weekend days, usually in mid- to late-November. My mother also has particular taste in leaves; not just any will do! These pictured are primarily Willow Oaks (in the south we usually call them Pin Oaks), Maple, some Red Oak, and various decorative trees such as Crepe Myrtles. Pin Oak is a favorite, since the leaves are narrow, which allows water to get to the ground through them, but they don’t break down too quickly, making them great for both moisture retention and mulching in garden rows. (The soil in our area is also unusual for NC, which is usually a bit acidic. Instead, we have more neutral to alkaline soil because of chalk that runs about 18 inches below ground. This means that the tannic acid in the oak leaves helps balance our soil, instead of causing problems.) Maples are fine; even though they are wider than Pin Oaks, they are also quicker to break down, and they don’t matte up to prevent water from getting through. Red Oak, Pecan, and others like that are okay, though they are not the premium leaves. The types we’ll just leave out are White Oak, Sycamore, or Magnolia. They are just too big and won’t break down easily, which makes them bad for both letting water through, and for fertilizing mulch (and walking on them isn’t great either). Using leaves is a lot cheaper and better for the soil than buying landscaping mulch, so Mom wants about 200 bags of leaves each fall. The main difficulty is getting them to fit into the shed! (We did pretty good this year.)

Building a Terraced Garden

I started building gardens because my mom has always been a big gardener, and I never wanted to do all the upkeep it takes, but I love planning and building things. So I started building new garden areas for her to plant and upkeep. It meant I got to do what I love, and she got to do what she loved, so everyone was happy! (Dad went along with it, since he likes figuring out how to build things, too!) I started about 20 years ago by building a couple of ponds and designing walkways for the back yard, then made a rock wall about 2 years later that used about 13 tons of rocks, and just kept going. I do a lot of the planning and physical labor, with Dad helping with problem areas. So for this entry, I’ll describe the first half of building a terraced garden on a steep hill at the back of the property. One thing I always do is use whatever we have around to build with, so that we buy as little as possible. I think it also makes the finished product look more natural. So this garden started with a really overgrown hill about 20-25 feet down and about the same across. First the ivy and undergrowth had to be cleared, which was done by pulling it all up by hand. We really hate to use poison, and ivy will actually come up pretty well by just pulling it up. I’ll confess, I didn’t do this part (thanks Mom!).

After that, I planned out where the logs would go for terracing. For pictures of this process, check out my Gallery page, and you can get an idea of how steep and big this space is. There was a lot of precarious balancing when I was digging in the first places for logs. Once I had a platform dug for a log, I rolled or moved it down from above, and then put in rebar to hold the rest of the logs in place. Generally, I did 3 or 4 logs up to create a terrace. Once these spaces were created, I threw down dirt from the top to fill in the new space. There were also some small terraces I created to have smaller areas to plant down the hill. One of the things I like to do is look at the shape of the space, and work with it. I don’t try to force my own design on the land, but just look at what is already there, and make it a little easier to plant. I also built a staircase from old pieces of slab concrete, some of them from when my parents moved into the house (my dad grew up on a farm, you don’t throw away useful stuff😉).  For the staircase, I dug platforms into the hillside, starting at the top, put one of the slabs in place, then worked my way down the hill, building stairs as I went. I would slide the heavy concrete pieces down beside the staircase as I got further down, some of the bottom ones were probably about 100 pounds.

Once all of the stairs were in place, I built some more terraces along the side for planting areas. The final addition was putting in the railing about 6 months later, using uprights driven into the hill, and screwing on tree limbs from fallen trees to create the rail (Dad does the drilling; at under 5 feet tall, I have some problems with leverage!). It worked out pretty well!

If you are considering doing something like this, the main thing to keep in mind is to plan, plan, plan. It is a lot easier to adjust what you want to do later, if you have planned the steps to get there from the start. ‘Winging it’ rarely works out well, or at least involves a lot of cursing!

Back to Top
css.php