
I started carving Gingerbread Molds while working at Old Salem. The history of Gingerbread was something that I had to answer a lot while I worked there. I would be the person to call whenever there were media requests about that history, so I eventually wrote a paper on the history from the Middle Ages until the modern day, just so I would be able to pull up information whenever I got a call from a TV station or magazine, or had to appear on a TV feed for Christmas. (This happened all the time during the Christmas season, the last one I did for Our State can be seen here.) The more I researched, the more I understood that molded Gingerbread was commonly made for Christmas in Europe since the Middle Ages. The Moravians continued the practice until sometime in the mid-19th century,so I decided to carve some molds for us to use when we did Christmas baking at Old Salem. We had some original molds from the early 19th century in our collection, so I started with those designs. I am not good at creating original artwork, at least not drawings, but I can copy most things. So I took pictures or drew copies of the original molds, and then transferred the design onto wood blocks and started carving. I have also carved printing blocks for making paste paper (the adult version of finger-painting), so I had some practice with carving. The main thing to remember with carving things like this is to take off small amounts at a time, because you can’t put the wood back on if you take off the wrong piece. I make knife cuts around the parts I want to remove, so that when I am carving, the wood chip will stop at the cut, which makes it less likely to remove wood you want to keep! One of the more difficult things to remember when carving a cookie mold is that you are making a reverse image, so what you want to project up you need to carve deeper. It requires a little thinking before starting to carve.
The wood I use is generally either poplar, maple, or pear if I can get it. Pear wood was the traditional for professional wood carvers in Europe to use for carving printing blocks for industrial purposes. Professional wood carvers would make designs for different industries in Germany. Printed paper makers, such as those making colored and paste paper, printed fabric makers, and book printers would all buy carved wooden molds for their shops, so the mold carvers were highly skilled and made extremely detailed carvings. Pear was the wood of choice because it is a hard wood that has a very fine grain, which allows for the fine designs. Oak has a coarse grain, and isn’t really good to use, and pine and other soft woods are also bad choices. Many people who do carving as a hobby today will say to use basswood, but I have tried it and found it too soft to get good detail (actually, I really dislike using basswood for carving, it is better for less detailed figurines). Poplar is easier to get, though maple will make beautiful molds. I have ordered pear wood from specialty wood suppliers, and I really like using it. It is also possible that other fruit woods would work, such as apple or cherry, but I have no experience with those. (In a later post, I’ll show the molded gingerbread cookies made with these designs. Also see the Gallery section for more carved molds.)
The first step is to put the image on paper, tack it to the wood block, and then use a pen or pointed stylus to impress the image into the wood. (Someone more skilled in drawing could draw the image directly onto the wood block. I like using the paper because I can adjust the image as much as I want without affecting the wood block I want to carve.)
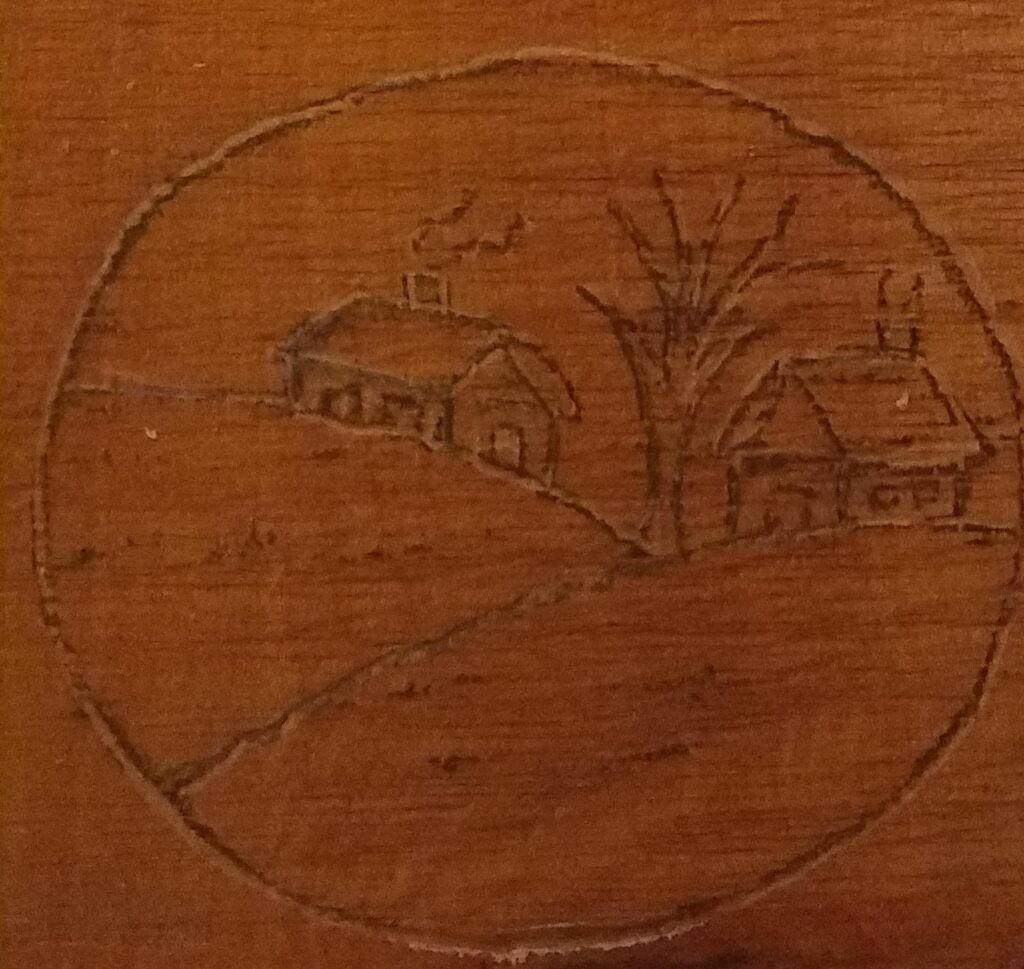
My next step is to trace the impression with a pencil. I don’t need to put in lines that are going to be lower than the surface. Here, there are several elements on the snowy hills that will be carved, but the snow will need to be higher (which means deeper carved) so I pencil those in once I reach that level.
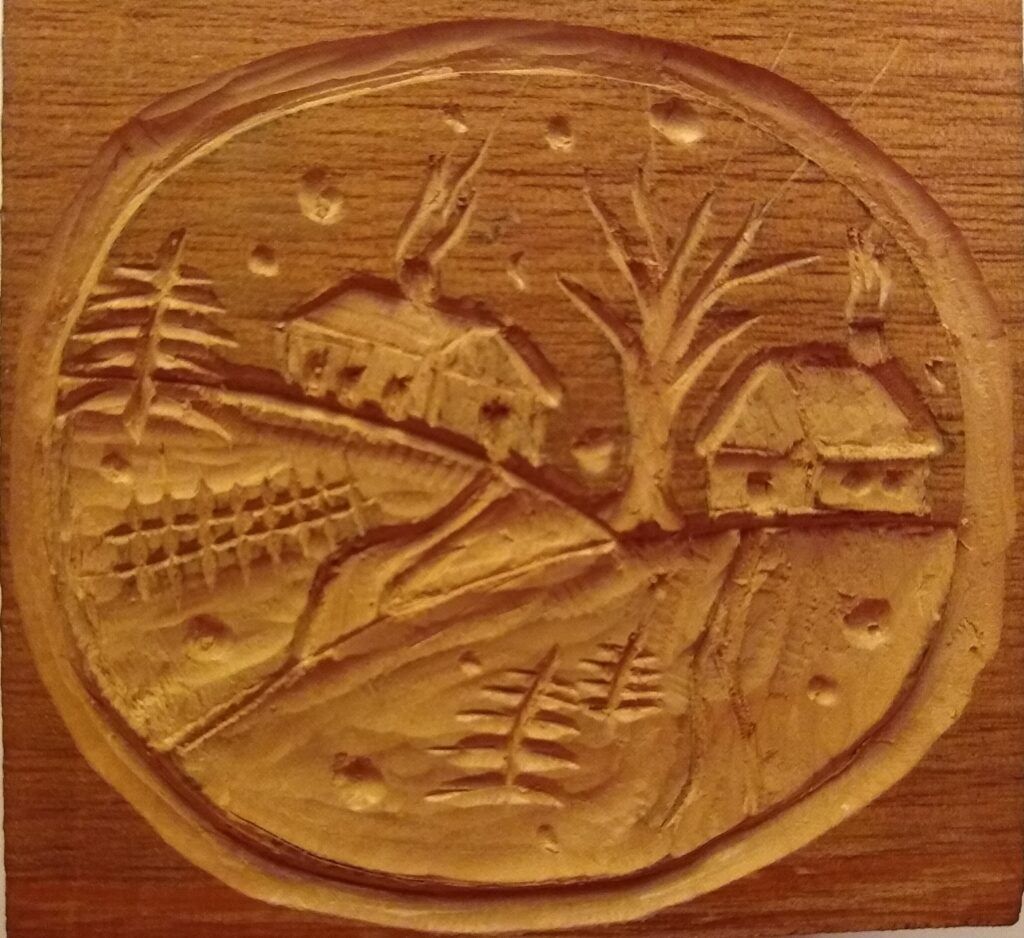
The carving is done using the pencil drawing as the base. I cut around the parts I want to be careful of with a knife, so that the carving tools don’t take off more wood in delicate spots. When I am finished with all carving, I will do a little sanding to finish some rough spots.