Cooking Over an Open Fire – Summer Edition – # 2

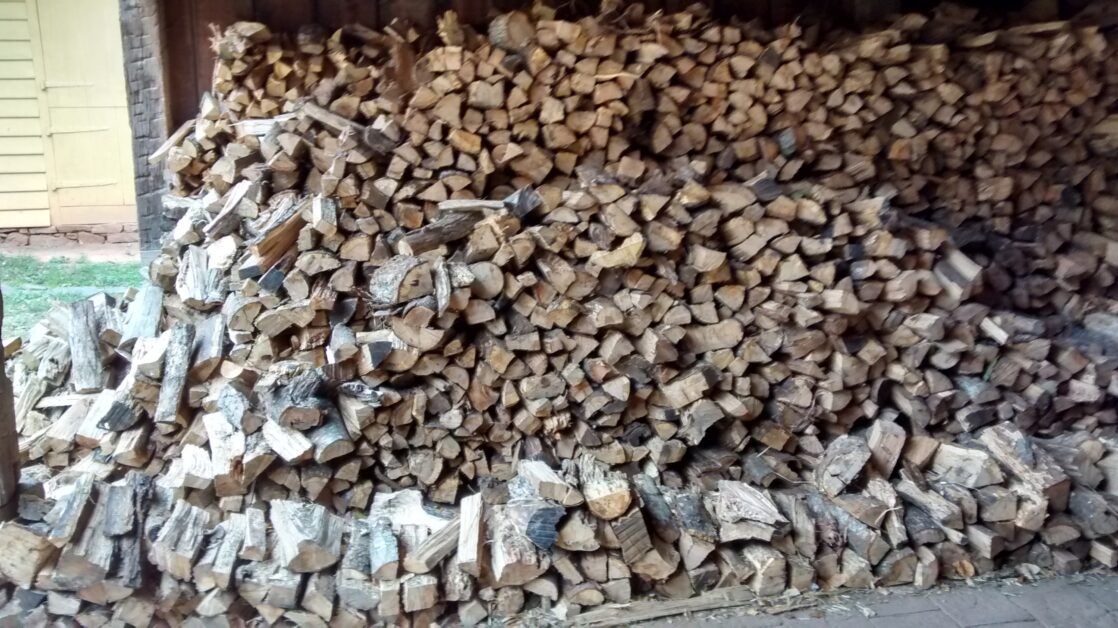
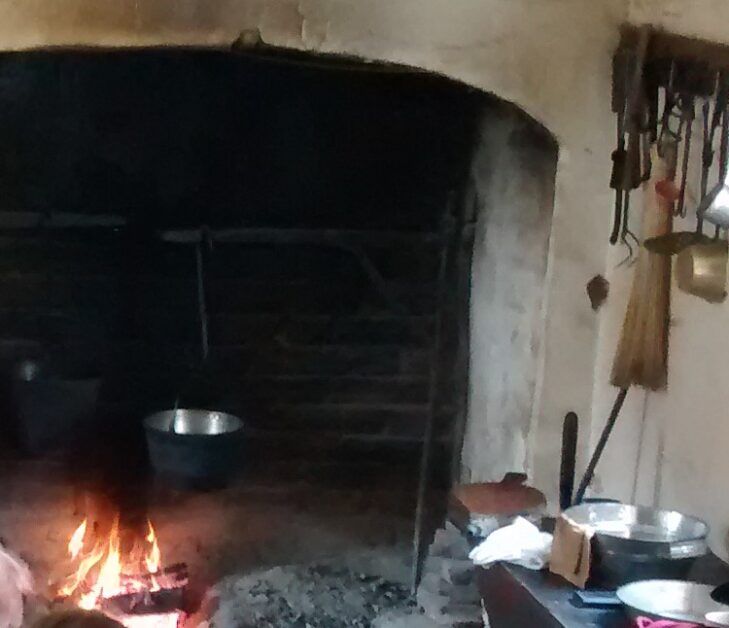
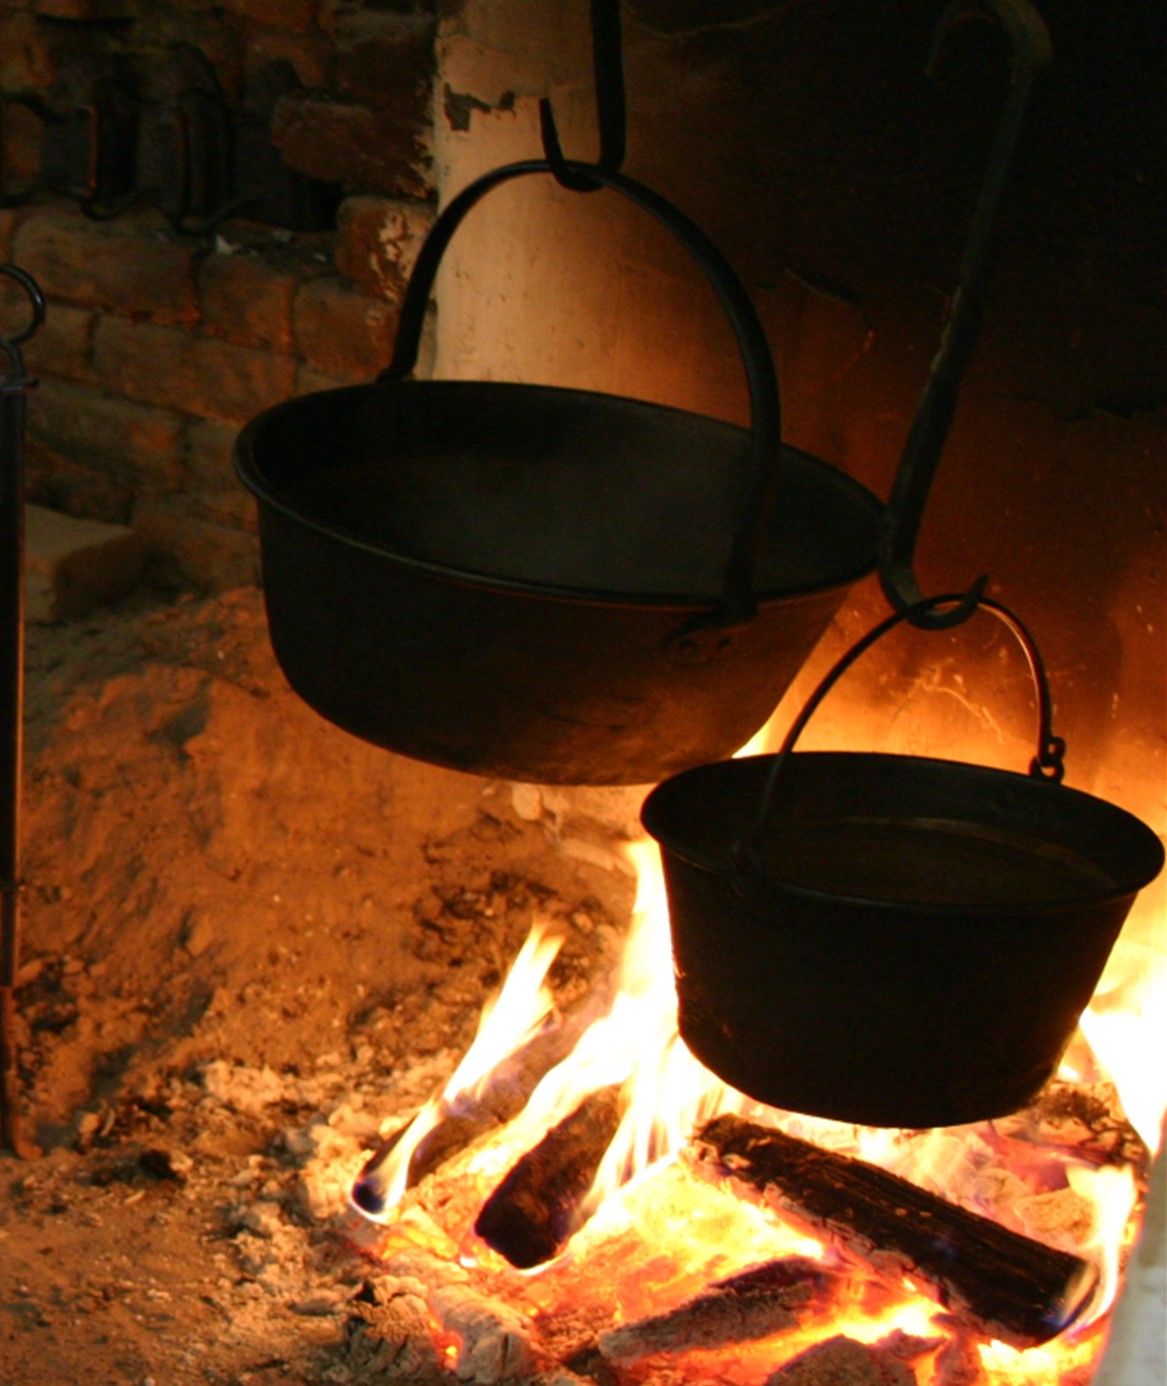
So, I am a few days late getting this post up, but classwork has been a bit hectic with the end of summer term coming up. Another post will be coming soon about video editing, one of the big new skills I am learning. However, to the second part of this blog post, the actual practice of cooking during the summer over an open fire. Just to remind everyone, wood, start fire with banked coals, get water on to heat. (Note: my experience is from research in a middle-class German immigrant town, which had enslaved workers in some, and later most, of the homes.)

So, now you have your fire going, you have gotten your water started heating, and it’s about 5:30 am. You’ve got a good start! Now its time to prepare the second largest meal of the day, breakfast. It is likely that the household has already gotten up and started working by now, because they also want to take advantage of the cooler morning hours. Breakfast in a German town would be around 7 to 8:30, depending on the family, but often a couple of hours of work would be done before eating (the English usually ate about 1 to 2 hours later than Germans for all meals of the day). I have even seen mentions of ‘second breakfast’ in records, which probably indicated getting some type of bread before starting work, especially those doing heavy labor, and then sitting down to a full meal once it was cooked (you thought Hobbits thought this up?). One thing to keep in mind about breakfast – if you wanted meat, it needed to be either quick cooking, or leftover from the day before. The thing to remember about meat before modern storage (meaning freezing or refrigeration) is that your choices for fresh meat are limited to the times you can slaughter and eat the meat before it spoils. That means there are big differences to what types of meat you are eating in summer, and how you need to cook it. Fresh pork is not available outside of the coldest months, and those are fairly short in NC. Between November and February at the latest would be the only time you ate fresh pork. Other than that, it was all cured (German families raised pigs on small lots and put up their own pork). Beef has a longer time it is available, up into May and early June, especially for young animals (veal). Mutton, common with English, is similar to beef. But the most common types of meat for summer are the smaller animals, fish, poultry, and eel being the most common I have seen. All of these can be killed and eaten fairly quickly, so spoilage is less of a problem. Other than that, you need to soak and cook cured meat for long times, so you are not cooking them for breakfast. So if a cured ham was boiled yesterday, you can cut slices for the breakfast meal, otherwise, it will be something that can be fried quickly, such as sausages. Eggs are quick to cook, and easily available during summer. Left over pies or puddings from cooking the day before, or on a baking day, were also commonly served at breakfast (these could be savory or sweet pies). Breakfast would be a hearty meal, similar to our idea of lunch today.

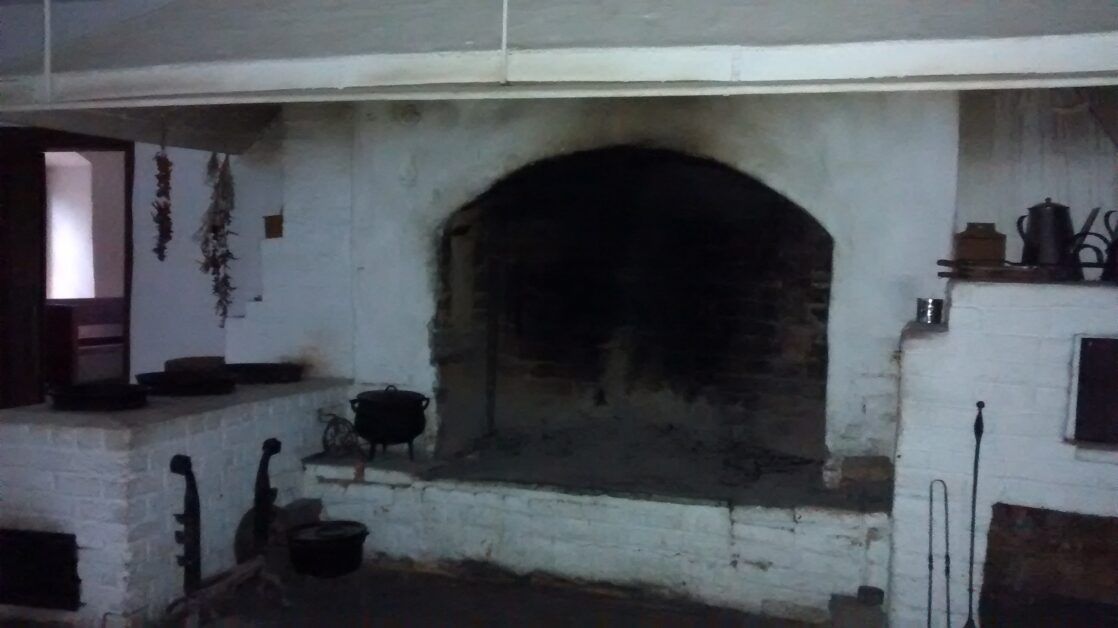
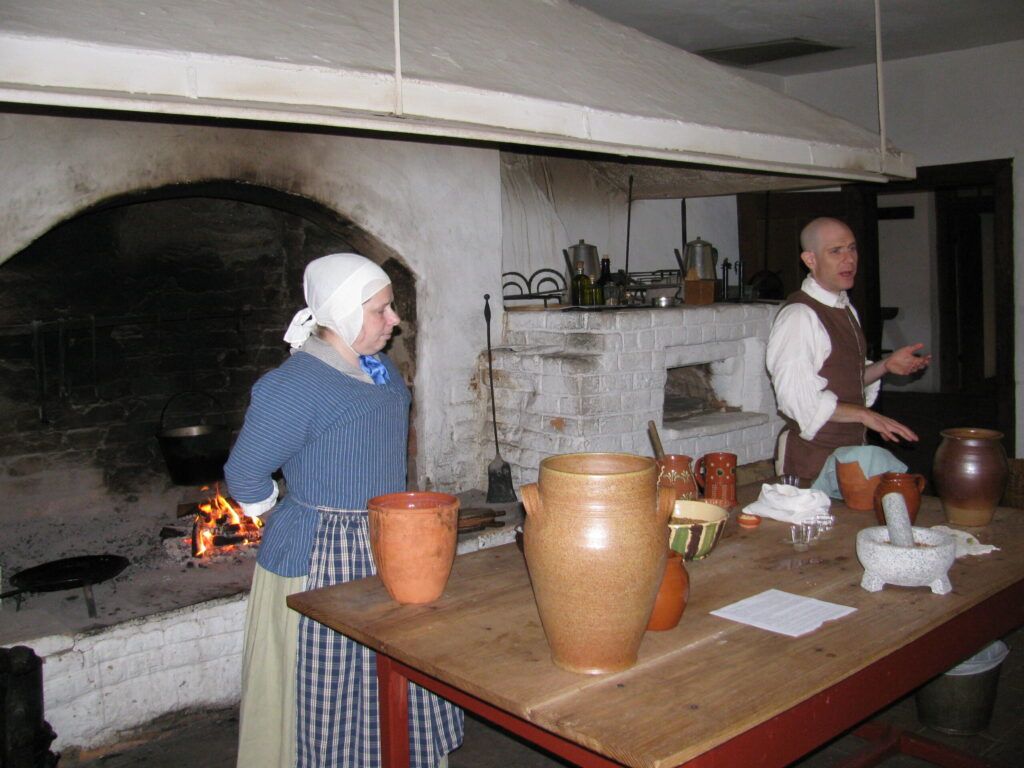
At the same time as getting breakfast ready, you have to get started on cooking dinner. This is the mid-day meal, and the biggest meal eaten. ‘Dinner’ is actually just the biggest meal of the day, but since most people have that at the end of the day now, we call that meal ‘dinner’. In the 18th century, the last meal of the day was ‘supper’, which was the smallest in terms of food consumed. Unless you were wealthy and had moved the main kitchen out of the household, no one wants the heat of a cooking fire to heat up the house, no matter who was doing the cooking. While it wasn’t uncommon for middle class households to have enslaved women cooking for them, there was still the issue of a hot chimney heating up the house, so most food was consumed before the hottest part of the day. Another thing to consider is how you want to serve the food – hot or ‘room temp’. Remember that ‘room temp’ in the 1700s is not 72 degrees, its whatever the house is at noon. So if you can fix some items early, then serve them at room temperature, you can get some pretty hearty meals without cooking up until the last minute. Something that was commonly served was savory egg pies, similar to a quiche, that could easily be prepared early, and then served at meal time at room temp. Most savory pies and puddings could be cooked early and served at room temp during the summer.

The best way to avoid the heat of the fire? Don’t cook the food. In summer, there are plenty of options for cold salads made with cucumbers, beans, and other garden produce that don’t require heat. Cooking a large ham can be done one day, then it can be used for several days after to create cold meals. A beehive bake oven (German style) contains the heat much better than an open hearth – when you have to bake bread, the best use of that heat is to bake other items that can be used over the next few days to supplement uncooked produce. All of these tricks allows a cook to limit the time in summer that the kitchen fire needs to be lit. But what about supper, you say? Well, that was the smallest meal of the day, especially in summer. You have worked all day in the heat. Most likely, you took a break at the hottest point of the day, and with sunlight lasting into the evening, you can work later when it gets a little cooler. A big, hot meal is the last thing you want to eat. Supper in summer might be bread and butter, or some fresh, green corn (field corn eaten before it matures was called ‘green’ when the shucks were still green; that is the only sweet corn that was available, and it was only eaten in late July to the first week or so of August). And that was all you had. The only people who ate big meals in the evening were the very wealthy who had separate kitchens, had not done heavy physical work during the day, and had enslaved women and men doing the cooking for them. Without all of those elements, supper was a small meal, and might not even be eaten at all in the hottest weeks of the year (a slice of bread and some beer would be enough for many).

So if you ever wondered how people dealt with cooking before the gas or electric stove and modern air conditioning, wonder no more. They adjusted what they ate and how they cooked, and dealt with the heat just like we do – by staying as cool as possible!

Cooking Over An Open Fire – Summer Edition – #1

So, I have been intending to write about my experience cooking on an 18th century hearth with an open fire, and what better time to start that set of postings than during the beginning of the hot season in NC! To give a little background on my experience with hearth cooking, I am not a camper or a girl scout type of open fire cook. Personally, I like my gas stove, refrigerator, and running water when I am cooking for personal enjoyment. My open hearth experience is all due to my work in living history, where I got paid to work over an open hearth in July and August. It also means that I have cooked full, three course meals on a hearth, and served them to staff during working hours. This experience means that I am not going to talk about all the nifty camping equipment you can buy to cook with. Instead, I am going to give you an idea of how hearth cooking was done when it was the only option, and what middle class people did with average kitchens, not what the wealthy had available to them (I have never cooked in a kitchen like at Monticello, for instance). In this first post, I’ll give some of the starting points, and then next week I’ll continue with some specifics about summer cooking short-cuts.

The first thing to know about hearth cooking is that it is all about the wood. I have done a lot of research about supplying and purchasing for kitchens, as well as cooking techniques, and let me tell you, all wood is not the same. In the 18th century, small town stores would re-sell fire wood that they bought from wood-cutters and others who sold it. The only types of wood I have seen accepted as payment in this way is hickory and oak (probably red oak, as white oak is better used for building purposes). Hickory brought the highest price, but oak was common. The reason for only these two types of wood is because of how hearth cooking is done. Big flames are not really the point, what you want are the coals. Flames are hard to control, they flare in and out, so cooking with flames isn’t really very efficient. Coals on the other hand radiate heat evenly, you can put them right where you want the heat, and you can ‘turn up’ the heat by putting more coals, or ‘turn down’ the heat by removing them. Hickory and oak, properly dried out, provide very good coals that radiate heat for longer than other types of wood. Properly dried out means that you can’t use green, or freshly cut, wood. Green wood takes high heat and a lot of attention to catch fire, and the extreme heat means that it burns to ash quickly – it doesn’t produce coals. (I have worked with wood so green it foamed when you used it – trust me, don’t use green wood if you expect to get any delicate cooking done without cursing, a lot!)


How much wood do you need? More than you would ever believe. A true cord of wood is 4 feet wide, by 4 feet tall, by 8 feet long (I say a true cord, because almost no one who sells you firewood today will ever quote a price for a true cord; most wood today is sold by the truckload, and it varies a lot, depending on the truck and how it is put into the truck). How many cords a family would need depends on a lot of factors, so there isn’t really an average. However, most estimate that around 30+ cords would be necessary for middle class households, and that is every year (a lot depends on where you are living, what type of heating is used, and house construction). That’s a lot of firewood! While that isn’t just for cooking, the kitchen would be the heaviest user of wood in a house, since cooking would take place year-round, while heating would just be seasonal. Summer cooking would definitely use less wood, but there would still be the need to have a fire everyday in the kitchen hearth, even if only for a few hours in small family homes.

Since I will continue this post next week, I want to begin with how a cook would start each day’s work. The next post will be more on how to cook quickly in summer, and what type of dishes would be most likely eaten in the hot season. As for getting started, the first thing to remember is – it’s hot in summer! I know, this seems obvious, but lets really look at what that means for a cook. With longer days, you really do want to get started as soon as possible with getting a fire going in summer. The main thing to consider is how fast can you get any work done over the fire, so that you can get it out and stop heating up the chimney. And no, most people did not have outside kitchens. That is another chimney and building to construct, and your average person would not bother with it. Instead, getting up by 4:30 in the morning, getting as much done by noon as possible, then get that fire out was the way to go. You might use an outside fire pit to heat water later in the day, but the main cooking would all be done by the noon meal. Another consideration – chimneys draw better when the air around the chimney is cooler. Really hot, humid days means that more smoke gets into the house, so the earlier you get that fire going, the better.

As for starting a fire, no matches, but also no flint and steel. Flint and steel looks good in the movies or written about in a book, but it is actually a pain to do, especially when it’s humid. The best option is to bank your fire carefully, which means to cover up the coals with ashes, and to do that before they burn out completely. That way, you just brush the ashes off, and have hot coals to start your fire the next day. (A big pile of coals properly banked will stay hot for several days.) And what is the first thing you put on the fire? Good question. The very first thing, after you make sure the fire has caught the wood, is to put a big pot of water on to heat. You’re going to need that for washing dishes, adding to cooking pots, all sorts of things. Generally, I want about 3-5 gallons of hot water available, depending on what kind of meal you are preparing (in summer, you might be fine with 3 gallons if you are doing less heavy cooking). And how do you get that water? Ah, the really fun part – go get it. Either from a well, or a creek or stream. I did sometimes have indoor water, but so did the 18th century town I was recreating. Most cooks would need to get water from some distance away, and carry it in wooden buckets. Two buckets full generally gets you 5 gallons at a time, and weigh about 50 pounds combined. You will usually need at least 10 gallons of water total, and I often got more over the course of cooking and washing dishes. (Don’t remind me about laundry days, then you’ll need between 40 and 50 gallons; yes, I have done laundry by hand!)

The next blog post will be about the actual cooking, but for this beginning, let’s look at a few things that the cook/housekeeper also would need to do that would involve a fire. Laundry was a 2-3 day job for most people. Two days if you don’t count the sorting, mending and soaking at the beginning. And those 2 days would need fire. The laundry itself would be boiled during the 18th century, and boiling a 30 gallon kettle of water takes several hours of a really hot fire. This was usually done outside, hopefully under shade if you’re lucky. Ironing was the second day, and for that task you have to set the irons in front of a hot fire to heat them. Depending on how much you need to iron, it can take anywhere from an hour to 2-3 hours. Since meals will also be needed those days, some planning needs to be done to make sure whatever is cooked can be done on the same fire if possible, or you have leftovers that don’t need heating (such as pre-baked dishes and fresh produce). The other big job that needs a fire is baking. If you’re English, a loaf or two every few days will need to be baked during regular cooking. Germans did batch baking, using one day to produce all the bread and many other baked goods needed for the week in a beehive oven (if you are smart, you plan laundry soon after baking). Both of these methods require additional fire and wood beyond what is needed for cooking. So next time you decide its just too hot this summer, think about having to work over a fire (and without air conditioning!).

A Little Bit on Weights and Measures

Ok, so this is a longer post than I planned, but hopefully it holds your attention. I expect a lot of people will think it can’t possibly be fun to study weights and measurements, but I promise you, it really is! There is a lot of interesting trivia, and its not just that the US doesn’t use the metric system like the rest of the world. In this post, I am going to link to a lot of different sources, but hopefully I can convince you that this subject is worth reading about!

Weights and measures are actually more important than we think. Its not just that we use them everywhere, they also help society run smoothly. The first writing that has been found was used to keep track of weights and measures, so that people knew how much was paid and owed for goods, services, and taxes. It has been assumed that writing was developed to keep track of these things in settled groups of people, the first ‘civilizations’, at least as we judge them today. So it is hard to overstate how important weights and measures are to a society. In just the last few years, scientists have officially begun to shift away from a physical thing to represent the prototypes of weights and distances, to a mathematical calculation based on universal constants. If this sounds a bit crazy, just consider why they need this. In a physical object, such as an official object to identify a kilogram, there is some loss or gain of mass over time (in terms of atoms- these are some small numbers, folks!), no matter how carefully it is stored. With the need for the absolutely precise measurements needed by today’s standards, basing units of measurement on something that never changes is essential! This change was just approved in 2019, after years of work to establish the calculations. If you want to read up on this, here is a link to a story on Vox about the process.

Early writing from Mesopotamia

This brings up a particular point about the metric system, and the United States still using imperial weights and measures. The ‘Imperial’ system is based on our use of the British-style weights and measures, with all of its inconsistencies between types. (What inconsistencies? Just consider how many ways you can divide an inch – by thirds, fourths, eighths, sixteenths. Then look at the pound, as compared to volumes, etc. That is a lot of different types of conversions!)While it is true that the basic system is hundreds of years old, there were almost uncounted ‘imperial’ systems in use until the mid 19th century, and they all differed not just by country, but also by the product being measured, and even by the city of original shipment. Basically, there were a lot of differences! In the 1790s, the new French Republic wanted to use the same system across its territory. The result was the metric system. So the metric system is older than you might think. It is also what our imperial system is based on today, after a treaty in 1875. You can read about the history of this creation in Pys.org.

Oh, you thought we didn’t use the metric system? Well, actually, yes we do. All our weights and measures are based on those metric prototypes that are being recalculated now. So really, even though you might think you are working with inches, feet, ounces and pounds, actually, your numbers are all percentages of centimeters, meters, grams and kilograms. A pound is 0.453592 of a kilogram; there is no other definition of it in science, no ultimate prototype pound. And if you wondered why everyone else has come around to this system, its because it actually is a lot easier to calculate with than the imperial system. And I know, everyone wants to say ‘No, our system is easier!’ But really, we already had this argument, and the other side won, it just took a long time to convince everyone.

In 1792, the new constitutional government of the United States had to make a decision about creating a new national currency. Under the previous Articles of Confederation, each state ran its own monetary policy, and rates of exchange across the new country were based on the British pounds, shillings, and pence (even though the most common coin used was Spanish; trust me, this is just the tip of the iceberg on complications to monetary policy!). When the federal government had the chance to start fresh, the decision was made to push everyone to switch to a new system based on a decimal system. What does a decimal system mean? It means we use base 10 for calculating money divisions, so 100 pennies is 1 dollar, and so on. What does this sound like? You guessed it, meters and kilograms! 100 centimeters is 1 meter, 1000 grams is 1 kilogram. All in base 10, because it makes calculating and conversions much easier. (Can you guess why base 10 and base 12 are so commonly used? It’s right in the palm of your hand; well, actually your fingers. Ten fingers makes base 10 natural. Now look at the fingers-not thumb, you count with that- of one hand, and the number of segments in each finger – 3 X 4 =12.) If you want some in-depth mathematics, The Story of Math is a great documentary on the development of numbers, counting, and why it is so important. It can get pretty complicated, but it’s still a really good series. (You can find it on Amazon Prime, but the link I have here is to the Films on Demand catalog, which is available to most people through public and academic libraries.)


However, don’t think that the new system put in place for money in 1792 was adopted quickly! Oh, no, they didn’t want to change any more than we do today. As a result, from the 1790s through at least the 1820s, and in some areas into the 1840s, there were plenty of people still using the old money calculations. I have personally looked at store account books from the 1820s that have (what I presume is) a younger clerk using dollars and cents for a sale, and the next entry the sale was recorded in pounds and shillings. And for every shilling, you had to calculate 12.5 cents, and then do all the conversions to total the accounts at the end of the day in dollars. Even later, in the mid 1800s in New York (and I will promise to update this blog when I relocate this source) I have read a newspaper letter to the editor from a citizen who stated that if stores and companies would stop using base 12 for product packaging, maybe people would switch over to the decimal system for money completely. Poor man, he would still be disappointed in us today. When was the last time you bought 10 eggs at the grocery? (The reason for packaging by the dozen in English products? Because there were 12 shillings in a pound, and that made products easier to calculate packaging divisions for selling. Why 13 in a ‘baker’s dozen’? Because in the 16th century English bakers were under-weighting their bread, and instead of risking a hefty fine for an under-weight dozen, they just threw in an extra one.) So you see, it is really hard to get people to change once they get used to something, especially a system they use every day.

If this has gotten you curious about the history of weights and measures, or you want to see some of those many different Imperial weights and measures that were used before metric, one of the better sources I have found is from a professor of mathematics at UNC-Chapel Hill. Dr. Russ Rowlett is retired, but his Dictionary for Units of Measurement is still up, and provides a great, easy to understand list of weights and measures from antiquity to today, as well as conversions where possible. If you are like me, it’s fun just to read. But I have also used it for research when needing to understand primary source material from the 18th century. If you are interested in currency history, try the American Numismatic Society or the U.S. Currency Education Program. And finally, if you really want to see how long a group known for accounting, money, and business can hold on to a system long after it is out of use, just take a look at the New York Stock Exchange. If you ever wondered why the ticker at the NYSE used fractional divisions of stock (instead of decimal divisions) until the beginning of this century, it dates back to the old weirdness I mentioned about the states using British accounting and Spanish coins. Spain divided its peso, or milled dollar (which America based our dollar size on) into 8 reales. Spain minted a lot more gold and silver coinage than anyone else during the 1600s and 1700s, so everyone used their coins, including us. New York state didn’t like the quarter division of the American dollar that was decided on in the 1790s, so they stuck with the 1/8 Spanish division into the late 19th century. The NYSE didn’t change it’s use of fractions until 2001! (What is 1/8 of a dollar? – 12.5 cents. And the Spanish reale was called a ‘bit’, so 2 bits was equal to a quarter. See how much fun this is?)

Recommendations – Documentaries

In this post, I am going to recommend a couple of documentaries about two of my favorite subjects, astronomy and language. I have watched both of these videos numerous times, and they always make me happy and tear up at the same time, as well as being just really good documentaries. Both of these videos are available on NCLive through most public and academic libraries. However, if you are not in North Carolina, you can check your own public library video streaming and DVD collection. The astronomy documentary, The Farthest, can also be found on PBS Passport. And currently the language documentary, Breaking the Maya Code, is on Amazon Prime.

I’ll start with The Farthest – Voyager in Space released in 2017, which is a film on the building, launch, and travel to the outer planets by Voyager 1 and Voyager 2. It is one of the best astronomy videos I have ever watched, and I really like documentaries and films on astronomy. The format includes commentary by some of the scientists who worked on the project, together with still photography, contemporary video, and a great music score that weaves into a whole that is both informative and entertaining. The film captures the epic scale of the achievement, but also makes it personal to the people that worked on the project, emphasizing the human aspect of the search for answers through science. While it has a lot of good science information in it, the emotion it conveys about why we reach for the stars, and strive to know what is outside our planet, is a constant theme of the film. If you want to feel optimistic about the human species, this film can give you hope. (2 hour film)


The second film I want to recommend is called Breaking the Maya Code (2008). Like the above documentary, it is one that combines interviews of linguists with a really good narrative and great pacing. The music score can’t compete with The Farthest, but other than that, it is an excellent documentary. The subject of this film is the effort to translate the Maya glyphs found in ancient Central American cities, after almost all books of the writing were destroyed during the Spanish Conquest. As a historian and a new librarian, I find this documentary painful when considering how much was lost when European colonists destroyed so many books of the Mayan people during the 1600s. However, it is also uplifting to see some efforts being made to return the writing to those Mayan descendants now living in southern Mexico, Belize, and Guatemala, especially since their modern language is what gave the clues to translating the ancient writing. The film follows the beginnings of the efforts to translate the carvings of the Mayans by Europeans during the 1800s, then goes back to the reasons for the loss of the language. From there, it picks back up with the efforts in the 20th century to figure out the complex Mayan language and translate it to better understand the Mayan culture. One of the most fascinating parts of the film is how the invention of the fax machine and the photocopier made such a difference in the speed of understanding. Even before the advent of the internet and its coordination of scientific discovery across the world, these two machines helped researchers to collaborate in their efforts. That cooperation and the use of many minds to make progress is inspiring for the future. And the last part of the video, about the schools in Guatemala that are teaching Mayan writing to its children, is a wonderful use of historical knowledge to help a people connect with the past that was taken from them. All in all, a great documentary to watch for anyone. (2 hour film)


Featured image at top is “Zine Study XIV: [language]” by Shawn Econo is licensed with CC BY-NC-SA 2.0. To view a copy of this license, visit https://creativecommons.org/licenses/by-nc-sa/2.0/

Poetry – First Fig & Second Fig, Edna St.Vincent Millay

I will be the first to admit that I often just read poetry for its own sake; I rarely read up on the poet and their life. Mostly this is because I believe that poetry speaks to each person differently, and it really doesn’t matter what the poet intended the reader to feel, or what the poet’s viewpoint was. Poetry is like paintings, you can enjoy them for themselves, you don’t need to study the artist to have an opinion or enjoy it. So I had never read up on Edna St. Vincent Millay, even though I like several of her poems. What I will say about the two poems I picked out to include on this blog is that once you know that Millay wrote and published them at the beginning of the roaring ’20s (that is, the 1920s), you can easily see why they were popular as soon as they were published!

The reason I like both First Fig and Second Fig is that I would probably never be this kind of person, but I can see the appeal. There is something about those who throw caution to the wind and just live that is interesting, and if nothing else entertaining, to those of us who are more realistic in our lives. I like that feeling the poems give of acknowledging the problems, but still enjoying the ride. It’s not exactly the same, but there is a similarity to someone like Alex Honnold, the Free Solo climber who climbed El Capitan without ropes. (I highly recommend the documentary, it is quite good. And for anyone who doesn’t like heights and thinks it might be a problem- I can say that it didn’t bother me at all, and I have a lot of problems with high places.)

For those who do like reading biographies, and wonder about Millay, a quick bio of her can be found on Literary Ladies Guide.

First Fig
My candle burns at both ends;
    It will not last the night;
But ah, my foes, and oh, my friends - 
    It gives a lovely light!


Second Fig
Safe upon the solid rock the ugly houses stand:
Come and see my shining palace built upon the sand!
                                 Edna St. Vincent Millay,
                                 A Few Figs from Thistles, 1921

Planting for Pollinators

So, it’s been a few weeks since I posted. This is what happens to me when I am devoting my writing inspiration to graduate classes! I had intended to post this a little over two weeks ago, so it’s a bit late. However, the season for being kind to bees and other pollinators is all year long. That means you can use these suggestions for any time you are considering planting or taking care of plants in your yard.

About 10 to 15 years ago, we started to plan our decorative plantings a bit more carefully. Like most people, we had picked out flowers we liked, and included a lot of perennials. (If you don’t like taking care of plants, but you do like having them around, native perennials are the best choices; you are mostly limited to seasonal maintenance in the spring and fall.) At that point, I started working more with planting and gardening at the museum I worked at, and researching native plants became a bigger part of my job. As a result, I started looking at using them more at home as well. I am at best a lazy gardener; the less work I have to do for upkeep, the happier I am. I will do a lot of pre-planning to keep from doing maintenance, and I don’t use pots at all, because you need to water them every day, or even twice a day, in the southern heat. For that reason, the more I read about native plants, the better I liked them. Picked to suit a space, they need less watering, less weeding, and provide more for wildlife than any hybrid or non-native species.

The ability to provide spaces and food for pollinators is what I am going to concentrate on for this blog post. Most of the showy, constantly blooming annuals that you can purchase at a plant store are no good to bees and other pollinators. The effect of hybridization often reduces the production of nectar for many plants. The other problem is grass. When people grow grass that looks like carpet (often by using pesticides and herbicides) it decreases the amount of food that pollinators have available to them. While that type of lawn may look good to human eyes, to a bee it looks like a desert.


This is what a bee and other pollinators would consider a nice lawn. It has some grass, but there is a lot of other ‘weeds’ mixed in, many of which are the earliest blooming flowers in the spring. I saw honey bees for the first time this spring in mid-March. By early April, there was enough blooming in the lawn that honey bees, bumble bees, and and native bees like miner bees were getting a lot of nectar from the broad-leafed weeds in the lawn. I know that a lot of people don’t like these type of plants in their lawn. However, you can really see the benefits of them in the spring, before a lot of the flowers that people like to plant have started blooming and you see how many pollinators are using them. The flowers in the photos are from a plant called ground ivy. I will be the first to admit that it doesn’t look the best in the yard, and it will send out runners to plague your flower beds. However, I have made peace with my need to get rid of it just because I don’t like its looks. For me, it is more important to create areas for local pollinators, especially since I need them for food production. I think that is a fair trade-off, especially since it allows me to continue to be a lazy gardener!


When it comes to other ways to help the different species of bees and other insects, there are a number of ways to plant for them throughout the year. Native species of plants will only bloom for certain periods of time during the year, so having a variety that blooms over the span of the growing season takes some planning. My mother and I have looked for plants native to North Carolina, and concentrated on making sure the variety covers March through to late October. There are also lists of plants that are popular with pollinators, and you can pick types that appeal to you and the bees. The best resources to find these plants are usually local Ag Extension agencies or native botanical gardens. If you don’t mind waiting a little longer, seeds are a very economical option for planting. Personally, I don’t like wildflower mixes that you can find in chain seed stores. Often, those seeds might be native somewhere in the US, but not necessarily your area. If you have a huge area you want to plant, they might work, but if you buy several different seed packages of local wildflowers, and mix them up yourself, you’ll usually get a better result. An added benefit is that most native annuals will reseed themselves, no need for you to plant new each year (I told you I was a lazy gardener). For those in NC, a good source of information on native plants is NC State University Extension or the Botanical Gardens at Chapel Hill. If you are wanting to look up plants or resources in other states, one of the best options is the Lady Bird Johnson Wildflower Center in Texas. This site has information that covers all of the US, and you can look up plants by a wide variety of options, such as state, color, size, type, and many others.

In addition to plants, bees can use a few other things, especially if you are trying to help their survival year-round. Leaving some open dirt is good for miner bees and other native bees that use it for nest building. Dead wood, brush piles, and the dead stems of plants left on instead of cutting away in the fall, are also good ways to help pollinators (and other wildlife) have a place to stay over winter or build nests in the spring. If you have a bird bath, put a rock in it that sticks halfway out of the water. This allows bees and other insects to drink during the dry times; they need a way to walk up to the water without falling in, and most bird baths are too deep.

There are also bee houses for native bees that don’t build hives you can put up (just make sure you have some dirt/mud around for them to use). We put one up just this spring, and got it up just in time for the bees to start using it. You can see one of the bamboo openings already closed up with mud beside the bee sticking its head out. This was just three days after we put this house up near the vegetable garden. There are already about 20 openings covered in 3 weeks, so the house got put up just in time! (This is a miner bee. The bees have liked the smaller bamboo openings this year!)

If you want to find out more about pollinators, and how to help them survive and thrive in you yard, the Xerces Society is a good source for information. They have advice for general plantings, pollinator needs, and even a certification system for those wanting to spread the word about a commitment to cultivating pollinators. There is also a lot of information about attracting butterflies, and specifically the monarchs. Here’s another advantage of being a lazy gardener – longer lawns and leaf litter help fireflies, since they spend the daytime at the bottom of grasses and in leaf piles. There is nothing like looking out in the early evening in late May to see the first fireflies rise from the yard and woods. It signals the beginnings of summer! There are a lot of ways to help cultivate pollinators around you. And don’t worry about bees around your house (unless you are allergic to bees; you’ll have to decide what you feel safe doing where you are spending a lot of time outdoors). Those bees don’t care anything about you when they are looking for flowers. (I’ll write a post later this summer about how to avoid wasps, yellow jackets, and others considered dangerous; hint, they’re really not when you consider what they are looking for at different times of the year). As long as you don’t get in their flight path, aren’t swatting at them, and avoid smelling like their food source, they will leave you alone. (Avoid flowery perfumes, shampoos, and sugary smells if you plan to be outside with the bees; if you do, it’s not their fault if they come take a look!) I’ve stood watching bees at flowers from less than a foot away, and they never paid the least attention to me. Watching bees is one of the great pleasures to having a pollinator garden.

Pysanky & Dyed Easter Eggs

I am one of those people who like to try a lot of different crafts (hence the name of this blog-A Little Bit of Everything!), and a number of years ago I decided to try making those really decorative Easter eggs called pysanky (all the pictures on this post and in the Gallery are eggs I have made). There are actually a lot of eastern European cultures that decorate Easter eggs, and the word pysanky is particularly Ukrainian. I have tried a number of other ways to decorate Easter eggs, and I’ll describe them below. Pysanky are one of the most elaborately designed forms, and it takes more time and equipment than many others. First, let me give a short history of coloring eggs for Easter. Eggs as a symbol of the renewal of spring goes back centuries, and while it is now associated with the Christian Easter, the tradition predates Christianity. Dyeing those eggs different colors also has a long history, and scratching a design into the dyed surface probably dates back just as far in time. It would be hard to document when exactly decorating eggs with multiple dyes in patterns using wax began, but it also has a long history. There was even an early form of the Easter bunny in Germany, called the Osterhase (Easter hare); a painting of the Osterhase carrying a basket of dyed eggs has been found in Pennsylvania from 1810 (link to image). PAAS egg dyes weren’t sold until 1893, when new dyes could be produced and sold in tablet form, and dissolved in water and vinegar. Like many traditions that were done on a smaller scale before the 20th century, the industrialization of materials and shipping allowed Easter egg dyeing to be done on a large scale. While more people were dyeing eggs, the skill and time to create the more intricate designs made that tradition stay confined to a smaller group of people.

The dyes used to color eggs before the mid-19th century were similar to dyes used for other products, using concentrated plant, animal, or mineral colors that could be made at home or purchased in the store. The production of the modern aniline dyes using coal-tar as a base began in the 19th century, but the wide use of them for most dyes didn’t really take off until the second half of the 1800s. Some of the commonly purchased dyes for eggs were cochineal, madder root, and turmeric. Other colors came from cooking at home, such as red cabbage juice, spinach juice, and onion skins. Some of these colors are ‘fugitive,’ meaning that they fade over time (sometimes a very short time if left in sunlight). Others last a long time if they are protected from strong light. I have tried all of them, and there are different techniques to using each dye to get the best results. Some work better hot, others work best cold after aging overnight, and many need vinegar as a mordant (a substance that allows the dye to stick to a surface). You can also get good results from combining certain colors to get others, just like you would with paints. For instance, red cabbage juice actually gives you a wonderful blue (as long as it ages 24 hours before use) but if you add yellow turmeric to it, you get green eggs. When I worked at the museum, we would do egg dyeing for Easter, and over time I experimented with many of these dyes.

The easiest one to try without too much effort is to use onion skins. You need a lot of yellow or red onion skins, but if you are using onions regularly in cooking just save the dry skins in a bag. You can dye the eggs by boiling them with the onion skins for a deep orange, or add vinegar and iron (just put in an iron vitamin) to get a dark brown. Or you can soak the onion skins and wrap them around the egg in layers, using string to hold them on the egg, then simmer for up to 1 hour or leave in the dye overnight. After the eggs cool, unwrap the onions skins and you will have a tie-dyed egg!

If you boil the egg for at least 30 minutes to an hour, and make sure it is stored where air can get to it (not in a plastic or styrofoam container), it will usually dry out inside over several months to a year, and can be kept indefinitely. The inside will gradually become a hard center, so you need to be careful not to shake it (I have broken them by not being careful, as the hard center acts like a little marble inside). I have seen decorated eggs, kept carefully, that are over 150 years old.

If you want to try something that takes a bit more time, you can scratch off the dye to create a picture on the egg. This works best with a single dye color, and the darker the dye, the better the design will show up. This can be done with most dyes, because the dye sits on the surface of the egg and scratching it with a pin will reveal the white of the egg below the dye. You want to make sure to boil the egg before doing this, and you need to get the feel for how hard to scratch with the pin, but you can get elaborate designs if you are willing to take the time. (This egg is dyed with red cabbage juice.)

Another technique is to use a straight pin to apply beeswax to a boiled egg, by heating the head of the pin in a candle flame and scooping up a small amount of beeswax, then creating a design on the egg before dyeing it. The wax will preserve the white color below it, and you melt off the beeswax to reveal the design. (This egg was dyed with madder root.)


Pysanky uses multiple dye colors with beeswax to preserve sections of each layer of color. In this technique, you gradually apply the dyes starting with the lightest color, then proceeding through to the darkest to create a finished design that can be very elaborate. The wax is applied using a tool called a kistka, which is a small funnel attached to the end of a handle. The funnel is heated in a candle flame, then used to scoop up beeswax. You then use the narrow end of the funnel to apply the wax to the egg, creating simple to elaborate designs with the wax. Any dye under the wax will not be dyed with the next colors. Other than the steady hand needed to apply the wax, the main skill with this technique is planning the design. You have to create the design knowing which color each part will be, and make sure to apply the wax in the order of the dye colors. You can’t go back to a lighter color once the darker dye has been applied. Pysanky design books give the instructions for which designs to apply with wax after each dye bath. At the end of the process, you gently heat the wax to melting point, and wipe it off to reveal the design (I’ve done this with just a candle flame, but you can also put it in an oven set on 100 degrees). If you would like to try to make pysanky, I recommend this website by a family who originally came from Ukraine and now sells dyes, design books, equipment, and even finished eggs.

Poetry-A man said to the universe

There are some poets that I like best, and Stephen Crane is one of them. For most people, they have more likely come across Crane when they had to read his most famous novel in high school, The Red Badge of Courage. For me, I like his poetry better than his books and short stories. He wrote a lot, especially when you consider that he died at the age of 28 in 1900 (wikipedia.com). What I like about his poetry is similar to why I like Emily Dickinson so much; they both pack a lot of meaning into a few words. I can read their poems over and over, and each time I enjoy how the words go together with the emotion and meaning. To me, the joy of reading poetry is like the idea behind the phrase ‘a picture is worth a thousand words’. Poetry that is written well can put more than a book’s worth of meaning into a very short space. I like rhyme and pattern, and a lot of people think poetry has to have those two elements. Stephen Crane doesn’t have rhyme, and many would not consider it to have a pattern either. For me, the ideas expressed are the pattern, and they are excellent. I’ll have some more posts that include other poems by Crane that I like, but this one is probably my favorite. If you are interested in reading more about and by Stephen Crane, this link is for a wikisource on his poetry and books, and this is his Wikipedia page.

A man said to the universe:
"Sir, I exist!"
"However," replied the universe,
"The fact has not created in me
A sense of obligation."

Stephen Crane
War Is Kind & Other Lines, 1905

Recommendation

Just to provide a little update on a new podcast I am looking forward to from Vox website. This is the one that I recommended from November, that is a science based podcast on unknown questions of science. I really liked their teaser episode that I linked to in that post, so I wanted to pass on that they are starting up the full podcast on March 10. I am going to embed their trailer here, but check them out on the website if you like weird science.

Recipes vs Receipts

A quick discussion about my new header pic for recipe blog posts. I am still getting better at putting pictures at the top of my blog posts, and I also want to be very careful about copyright law. I either use Creative Commons pictures, or I use my own pictures on this website. For the blog posts that I have with recipes in them, I have created a new header picture to use of a receipt book I made when I worked at the museum. I think a lot of people might be a bit confused as to why it says Receipt instead of Recipe, so I thought I would do a quick explanation of the difference. Up until the mid 19th century, cookbooks had receipts, not recipes, in them. A lot of this had to do with cooking over a hearth. There was simply too much variability in cooking conditions to give specific instructions for how to cook. The authors had to be vague on instructions to take into account all the different conditions that might be present. The type of hearth being used, the wood type, the cooking vessels, the time of year (weather, humidity, temp, type of raw ingredients available, etc) would all create very different options for the home cook. Even today, most cooking shows will give instructions on how to test your oven temp with a good thermometer if your baking times are different than stated, and everyone who has cooked on different surfaces (gas, electric, and especially induction) knows how different they can cook for the same dish. Multiply these variables by several factors and you get the problem for the authors of 18th century cookbooks. So instead of a recipe with specific instructions, you had a receipt that listed the items you needed and guidelines for cooking them. There were often substitution options for different spices, vegetables, and containers, heat instructions such as a ‘slow’ oven vs a ‘quick’ oven, and the all purpose ‘cook until done’ for time. All of this meant that a cook needed to be skilled in understanding how a receipt would be applied for a particular kitchen and time.

If you want to see a typical 18th century receipt, here is one from England, describing how to make Pigeons in Paste–Fill the belly of the Pigeon with Butter, a little Water, some Pepper and Salt, and cover it with a thin light Paste, and then to put it in a fine Linen Cloth, and boil it for a time in proportion to its bigness, and serve it up. When this is cut open, it will yield Sauce enough of a very agreeable Relish. The Country Housewife and Lady’s Director, Richard Bradley, 1736. Try giving that to today’s cook and see what they say about it! After years of experience reading and using this type of receipt, I could make this without too much trouble, but I wouldn’t want to serve it to guests the first time I made it. However, this gives a good example of the types of instructions in a published 18th century cookbook. If you were to look at a manuscript cookbook, you might have even less. I have seen major ingredients left off that I know are part of it, because the writer assumed they would remember the obvious ones and didn’t need to record them.

So that is the difference between recipe and receipt. For my own cooking, I still look at recipes like I do receipts. They are more strong suggestions to achieve a particular outcome than they are strict rules. I am always happy to change things I don’t like, or want to do a different way. This is why I am a good cook, but only a reluctant baker. Baking is much less forgiving of guesses and ‘good enough’ measurements. Personally, I consider cooking an art and baking a science, though I am sure that bakers might disagree!

Back to Top
css.php